Setup a Bitcoin Multisig in 5 minutes
Learn how to set up a Bitcoin multi-sig with Electrum
TLDR:
Multisigs are the safest way to self-custody BTC. The most common setup is “N-of-M”, meaning you need N keys to sign from a pool of M, where M >= N.
Electrum wallet’s been around since 2011 and provides battle-tested multisig functionality. It’s not the prettiest wallet, but it’s one of the best for the job.
Below we highlight how to download and set up an Electrum multisig with several keys, then how to both receive and send BTC out of the wallet.
Multisigs are not for everyone, they are vaults for high-values of BTC. Be careful not to protect your funds so well that you can’t even access them later!
The last few posts have been predominantly focused around Bitcoin as we’re seeing a lot of indicators suggesting an incoming period of price appreciation.
As your BTC holdings grow then it becomes pretty important to know how to store them securely, so this week I decided to cover how to create a Bitcoin multisig!
What is a Multisig
I’ve covered multisigs before in previous posts, in particular I explained what they are in another post on setting up a Safe multisig for Ethereum based assets. For the sake of keeping everything in a single post I’ll repeat what was covered there below.
The word multi-sig itself is an abbreviation of the words “multiple signatures”. In crypto we hold keys to our assets, not the assets themselves, and to move the assets we need to sign transactions with these keys.
Addresses are typically created as a mapping from our keys, meaning that an address generally has one key associated with it that’s used to sign. However with a multisig you need “multiple” keys to provide their “signatures” in order to transact, hence “multi” “sig”!
Most common multisig setups are “N-of-M”, meaning you need N keys to sign from the pool of M, where M >= N. For example a very common setup is a 2-of-3 multisig, meaning there are 3 keys but you only need 2 to successfully sign a transaction.
For this tutorial I’ve chosen to use the Electrum wallet’s multisig functionality.
Electrum wallet
Electrum is an open-source Bitcoin wallet that’s been around since 2011. It was created only a couple of years after the Bitcoin blockchain began, meaning it’s battle-tested and very secure. However, on the flipside it’s also old, a bit clunky and doesn’t have the prettiest interface.
There are alternatives such as one of Electrum’s main competitors called Armory which is more featureful, however it is even clunkier and more awkward to use.
There are also far more user-friendly wallets out there nowadays like Blue Wallet that do support multisig, but their configurability is more limited and don’t allow for hardware wallets to be used with your multisig.
Meanwhile most other Bitcoin browser wallets like Xverse and mobile wallets like Bread are far prettier and easier to use, yet don’t support multisigs.
Unfortunately this means we’re left with Electrum’s featureful wallet yet ugly interface. Although Electrum is not the most user-friendly wallet, it’s still relatively simple to use and has some of the best configurability.
Before you Get Started
For this tutorial we’re going to create a 2-of-3 multisig which, as I mentioned before, allows you to transact your BTC by signing with any combination of 2 keys from a total of 3 used to create the wallet.
So before we do anything we need those 3 keys.
If you want to be super secure, then I would recommend buying 3 different hardware wallets that you bring together to create the multisig, and then storing those 3 different devices in 3 separate locations.
However, you could also generate 3 different BIP39 keys/seed-phrases offline with a tool like Ian Coleman’s, that I covered in a previous post, and then store those keys on separate piece of paper in 3 separate locations.
Or, do some combination of hardware wallets and paper wallets. There’s no right answer for this, it really depends on your convenience. Remember that it’s far more common for people to lose access to their funds in crypto than it is to have someone steal them so don’t make it too complicated for yourself.
In creating this tutorial I created 1 temporary seed phrase that I later threw away, and used 2 hardware devices as the other 2 signatures.
Download & Configure Multisig
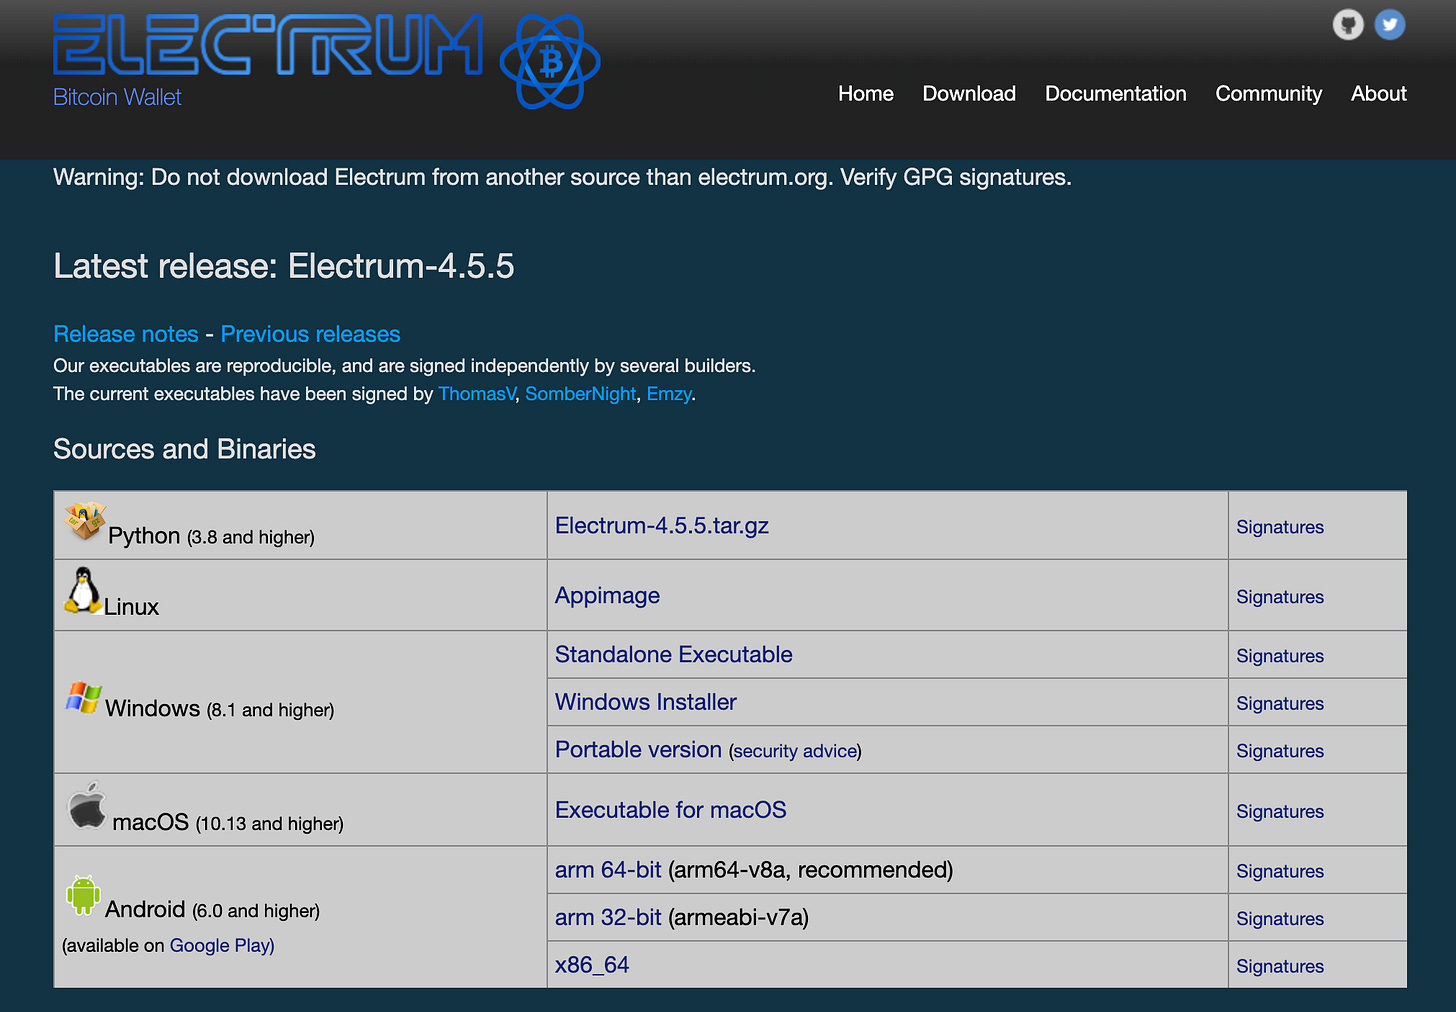
So now that we’re ready to get going, start by downloading the Electrum wallet directly from this link. Do not download it from any place other than their official site as it could be a hacked wallet that would eventually steal your funds.
Download the installer for your desktop device from this list, and then install it:
Once you’ve downloaded Electrum and opened it, you’ll be asked to create a new wallet. Here create a new “multi-signature wallet”.
Next, change it to be 3 cosigners with 2 signatures, which is essentially a 2-of-3 multisig, meaning you have 3 possible signers but only need 2 of them to sign. You can play with these variables if it makes sense for you, but it’s highly recommended you have some redundancy.
For example 1-of-1, 2-of-2, 3-of-3, etc, are not great because if one key gets lost then the multisig will be unusable forever. Similarly, 1-of-3, 1-of-4, etc, are not great either because if scammer gets just 1 of your keys then the multisig can be drained.
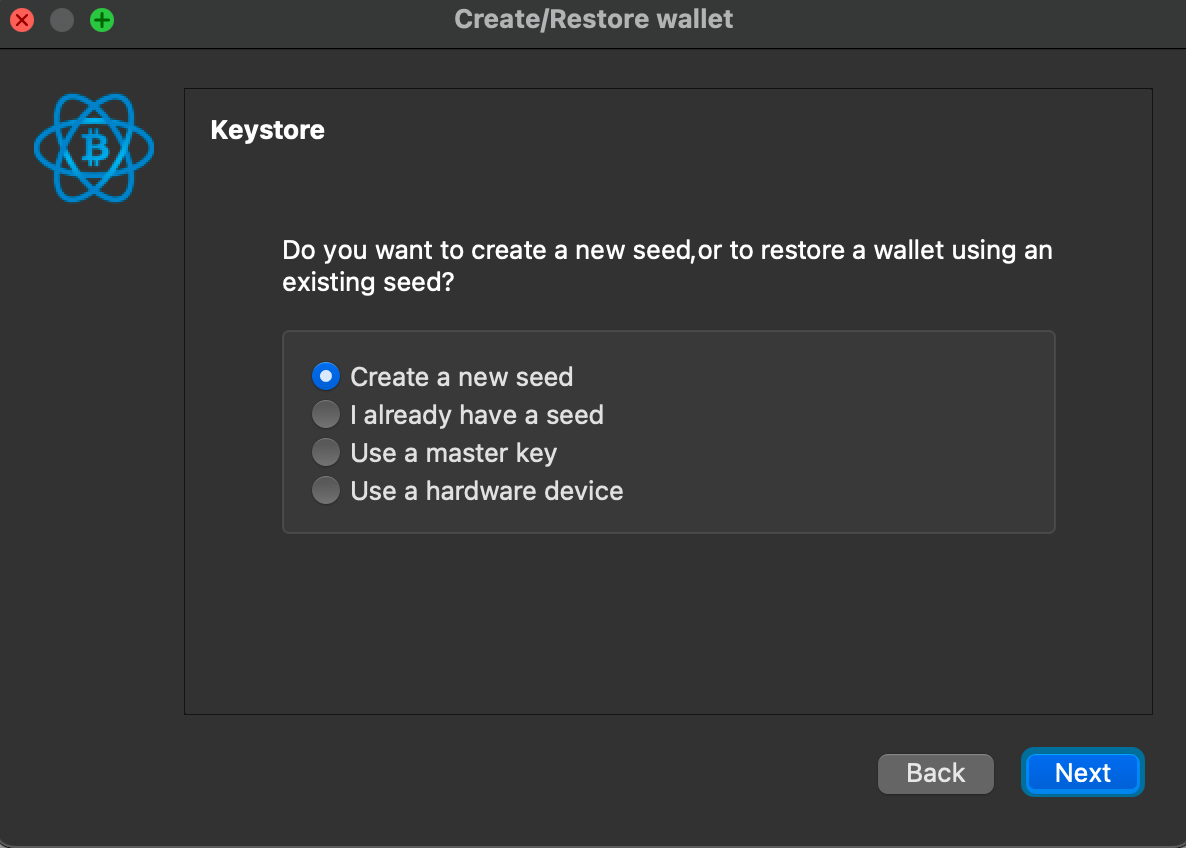
You’ll now have the option to add the first signer. You’re given 4 options:
Create a new seed → creates a whole new seed phrase
I already have a seed → signs with a seed phrase you already have
Use a master key → signs with a private key you already have
Use a hardware device → signs with a hardware wallet
In my test, I just created a whole new seed here and stored it on a piece of paper. With the intention of the two other cosigners being hardware wallets.
On selecting next you’re given the option to use a key, seed, or hardware device as the second cosigner. Electrum won’t give the option to generate a new seed phrase for you here, and as I say, I think for the best security you should use a hardware device.
If you use a hardware allet, it’ll ask you to connect your hardware wallet and confirm. Then afterwards it asks you about the derivation path, but I would leave it as default.
Now repeat the step above once again for the third cosigner. Once again my suggestion here is to use a separate hardware wallet. As you’ll have 1 handwritten seed and 2 hardware wallets. Any combination of 2 of these 3 will then be enough to move the BTC in the multisig.
Finally, you’ll be asked to optionally add a password, this is honestly not necessary, it’s just an additional security step. Nobody will be able to move your funds without the keys, but if want the additional protection that anyone who accesses your computer is unable to snoop around this wallet, then add a password to it too.
Congratulations you’ve now set up your multisig!
The next step is to test it out and make sure you can use it in the future when you’ll eventually need to.
Transacting with your Multisig
Before you send any significant amount of money to this wallet I’d start just testing it out with small amounts of BTC to ensure that you’re comforable transacting with it.
As I said before, it’s far more common for people to lose access to their BTC than it is for them to have it stolen, so don’t send large sums of money into the multisig until you feel confident that you can pull those funds out.
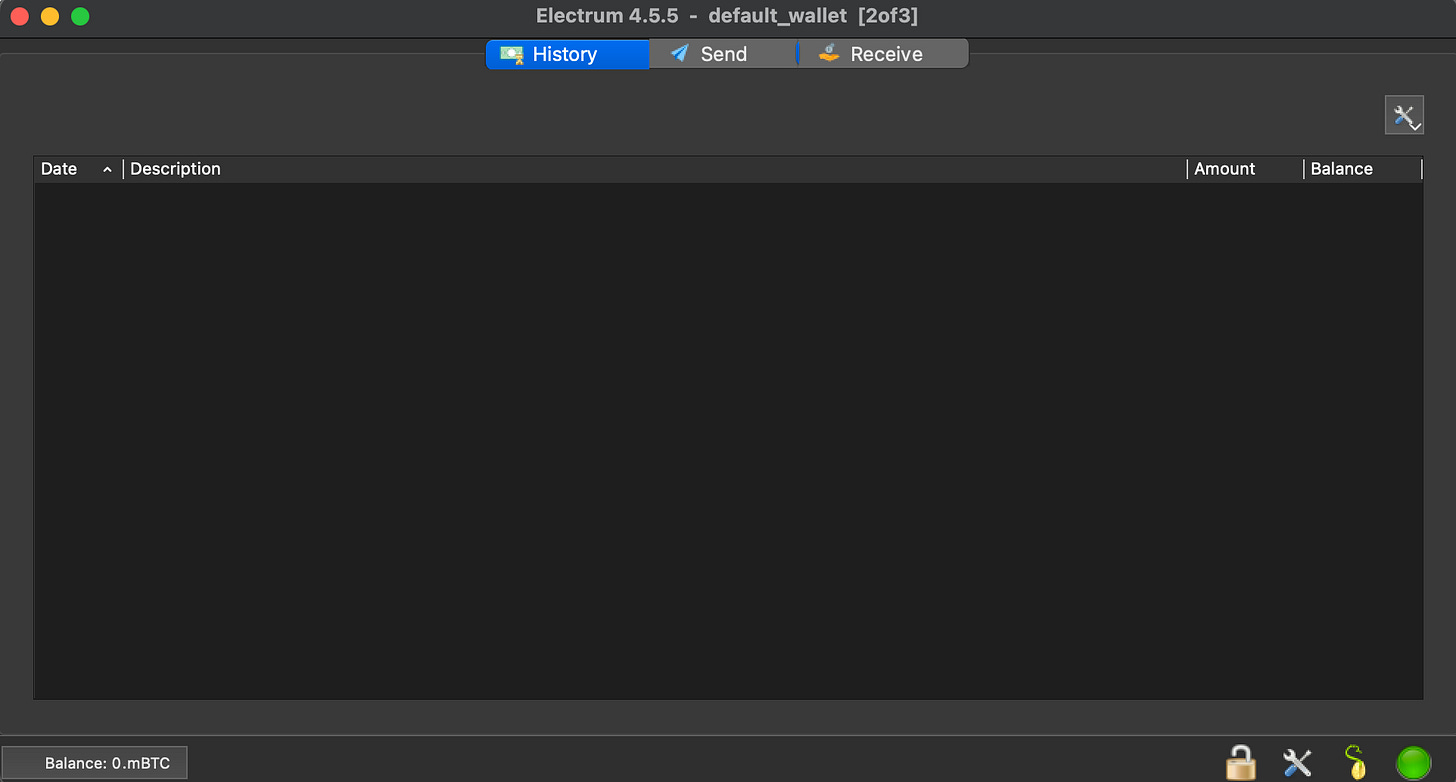
Let’s start by just opening up Electrum you’ll see the following:
This is a totally new multi-sig so there’s no history. To kick things off we want to send some funds in so select “Receive” at the top. Then select “Create Request”, copy the address generated on the right hand side and send some BTC over to it. Note that the address is just this part “bc1q…47k4”, the rest of the request you can ignore.
On sending BTC into the multisig, it’ll first show up as unconfirmed. Once that block has been mined you’ll eventually see it’s been received in the history. It’ll need a few more confirmations before the little icon on the left side changes to green.
Let’s now test sending this money back out, which is the most important part! If you can’t get the money out then you’ve essentially lost it.
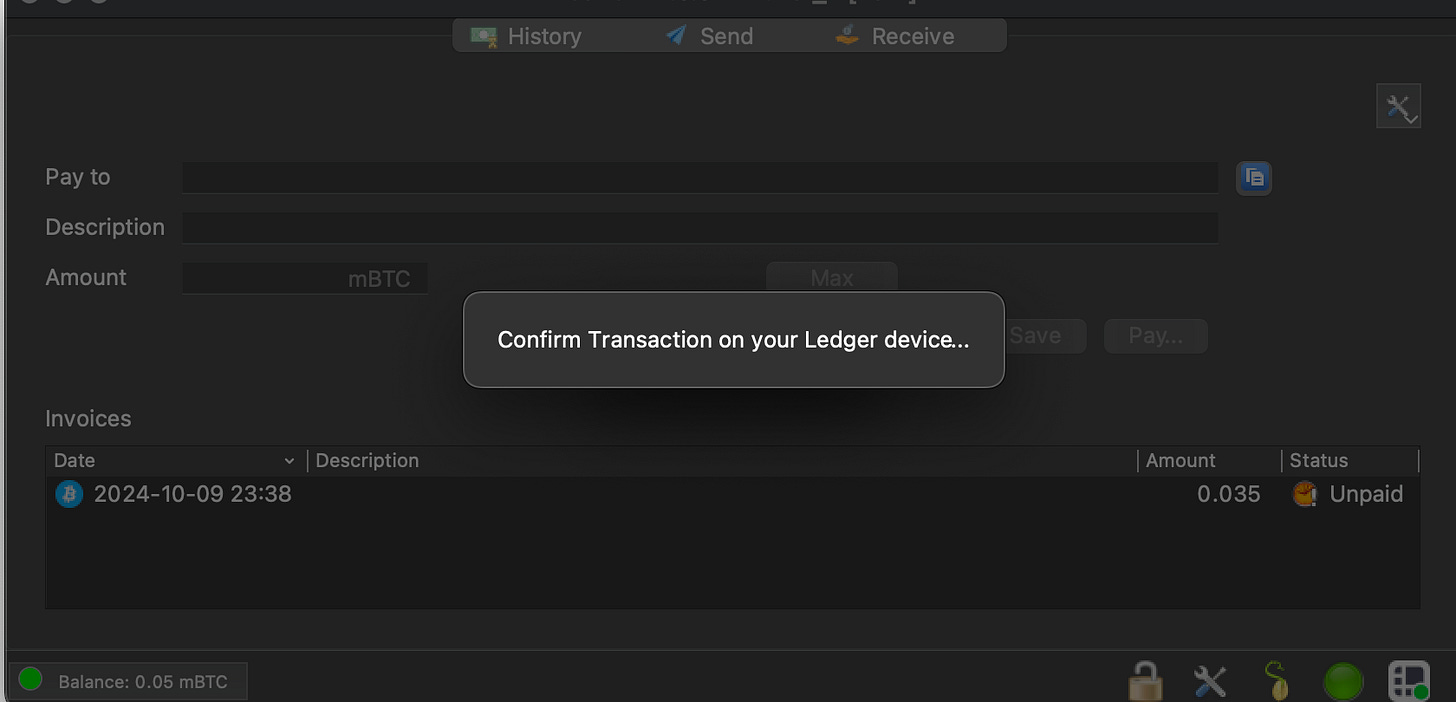
Select “Send”, put an amount in, and an address to send it to. As Electrum tries to sign the transaction for you, any keys or seed phrases that you’ve input directly will be used for you. However when it comes to signing the transaction with your hardware wallet(s), you’ll be asked to confirm on the device itself.
And once enough signers have confirmed you’ll get a “payment sent” message and the transaction will be sent to the Bitcoin network to be validated by the miners!
And that’s it - you’ve now successfully used your multisig to both receive and send BTC!
I’d run through this section a few more times though, even deleting the Electrum wallet entirely off your computer and recreating it.
If you’re using this multisig wallet predominantly as a vault, then you may only be sending BTC in, and may come to access it at some point in the future on an entirely different computer. So if there’s large sums of money involved it is best to test and test again.
Keep Safe
Congrats, you’ve now got your very own Bitcoin multisig set up!
An important reminder that I’ve said several times in this post is that it’s far more common to lose access to funds than it is to get them stolen. So you want to ensure you’ve tested taking your BTC out, and are certain you can take it out before putting significant amounts of BTC in.
As you can see in the example above I’ve done it with only around $3 worth of BTC, it’s best to play around with small numbers like this first. Then once you feel super confident on how to use it you can send larger amounts of BTC in to keep secure.
Remember to also keep each of the keys in different locations that you feel are entirely safe. If you’re doing a 2-of-3 multisig then keeping any 2 of those signers together essentially becomes the same as just having a normal wallet as a malicious actor can get hold of both of those keys at once and bypass your multisig’s main security mechanism.
Also, the same rules as always apply with your seed phrases, make sure to be super secure with them. Don’t for example save them as plain text on a device that’s connected to the Internet, like saving it on your phone’s notepad. Sure, if someone gets that seed phrase they can’t immediately hack your multisig but they are 1 signature closer to doing so.
Finally, multisigs are not for everyone, if you don’t have that much money to lose then there’s not much point in using them because as I’ve repeated several times above, you risk losing the signatures and therefore losing access to the funds.
However, if you do have notable BTC holdings and want to keep them extra safe, there’s near to no better way to keep your BTC safe than using a multisig, and now you know how to set one up for yourself.
Enjoy your newfound knowledge and stay safe out there!
Whenever you’re ready, these are the main ways I can help you:
All our latest content is FREE at beginners.tokenpage.xyz - Join an ever growing community of beginners learning about Bitcoin, Crypto and Web3 together. Jump in now and get a bonus 1-on-1 call with me for free.
VIP access beginners-vip.tokenpage.xyz - For those who want to have all their questions answered about crypto, I run weekly Q&A calls with other like-minded people in the VIP group.
Web3 Software development at tokenpage.xyz - We’ve been building in the space for several years now and can develop Web3 solutions for you.


