
Create your own OpenClaw agent
Learn how to set up your own personal AI Agent assistant
TLDR:
OpenClaw has taken the world by storm with its agent creation framework, thanks in part to the growth of the agent social network Moltbook.
Below you’ll learn how to create your own OpenClaw agent by setting up a VPS, creating your agent, and then configuring access to it on Telegram.
In this post we only set up the agent as there’s quite a few steps here, we’ll leave interacting with it further and getting it on Moltbook for next week’s post.
Last week I wrote about how to use Claude Code to write code for you, and briefly mentioned Clawdbot (now called OpenClaw). Since then a social network for OpenClaw agents emerged called “moltbook” that went viral!
So this week I decided to show you how to create your own OpenClaw agent and then next week we’ll look at getting it active on Moltbook, this new pioneering social network for agents.
If this post resonates with you and you enjoy the content then please share it with a friend and get rewarded for doing so!

This blog goes out weekly to over 20,000 subscribers. Please message me if you’re interested in sponsorships or partnerships.
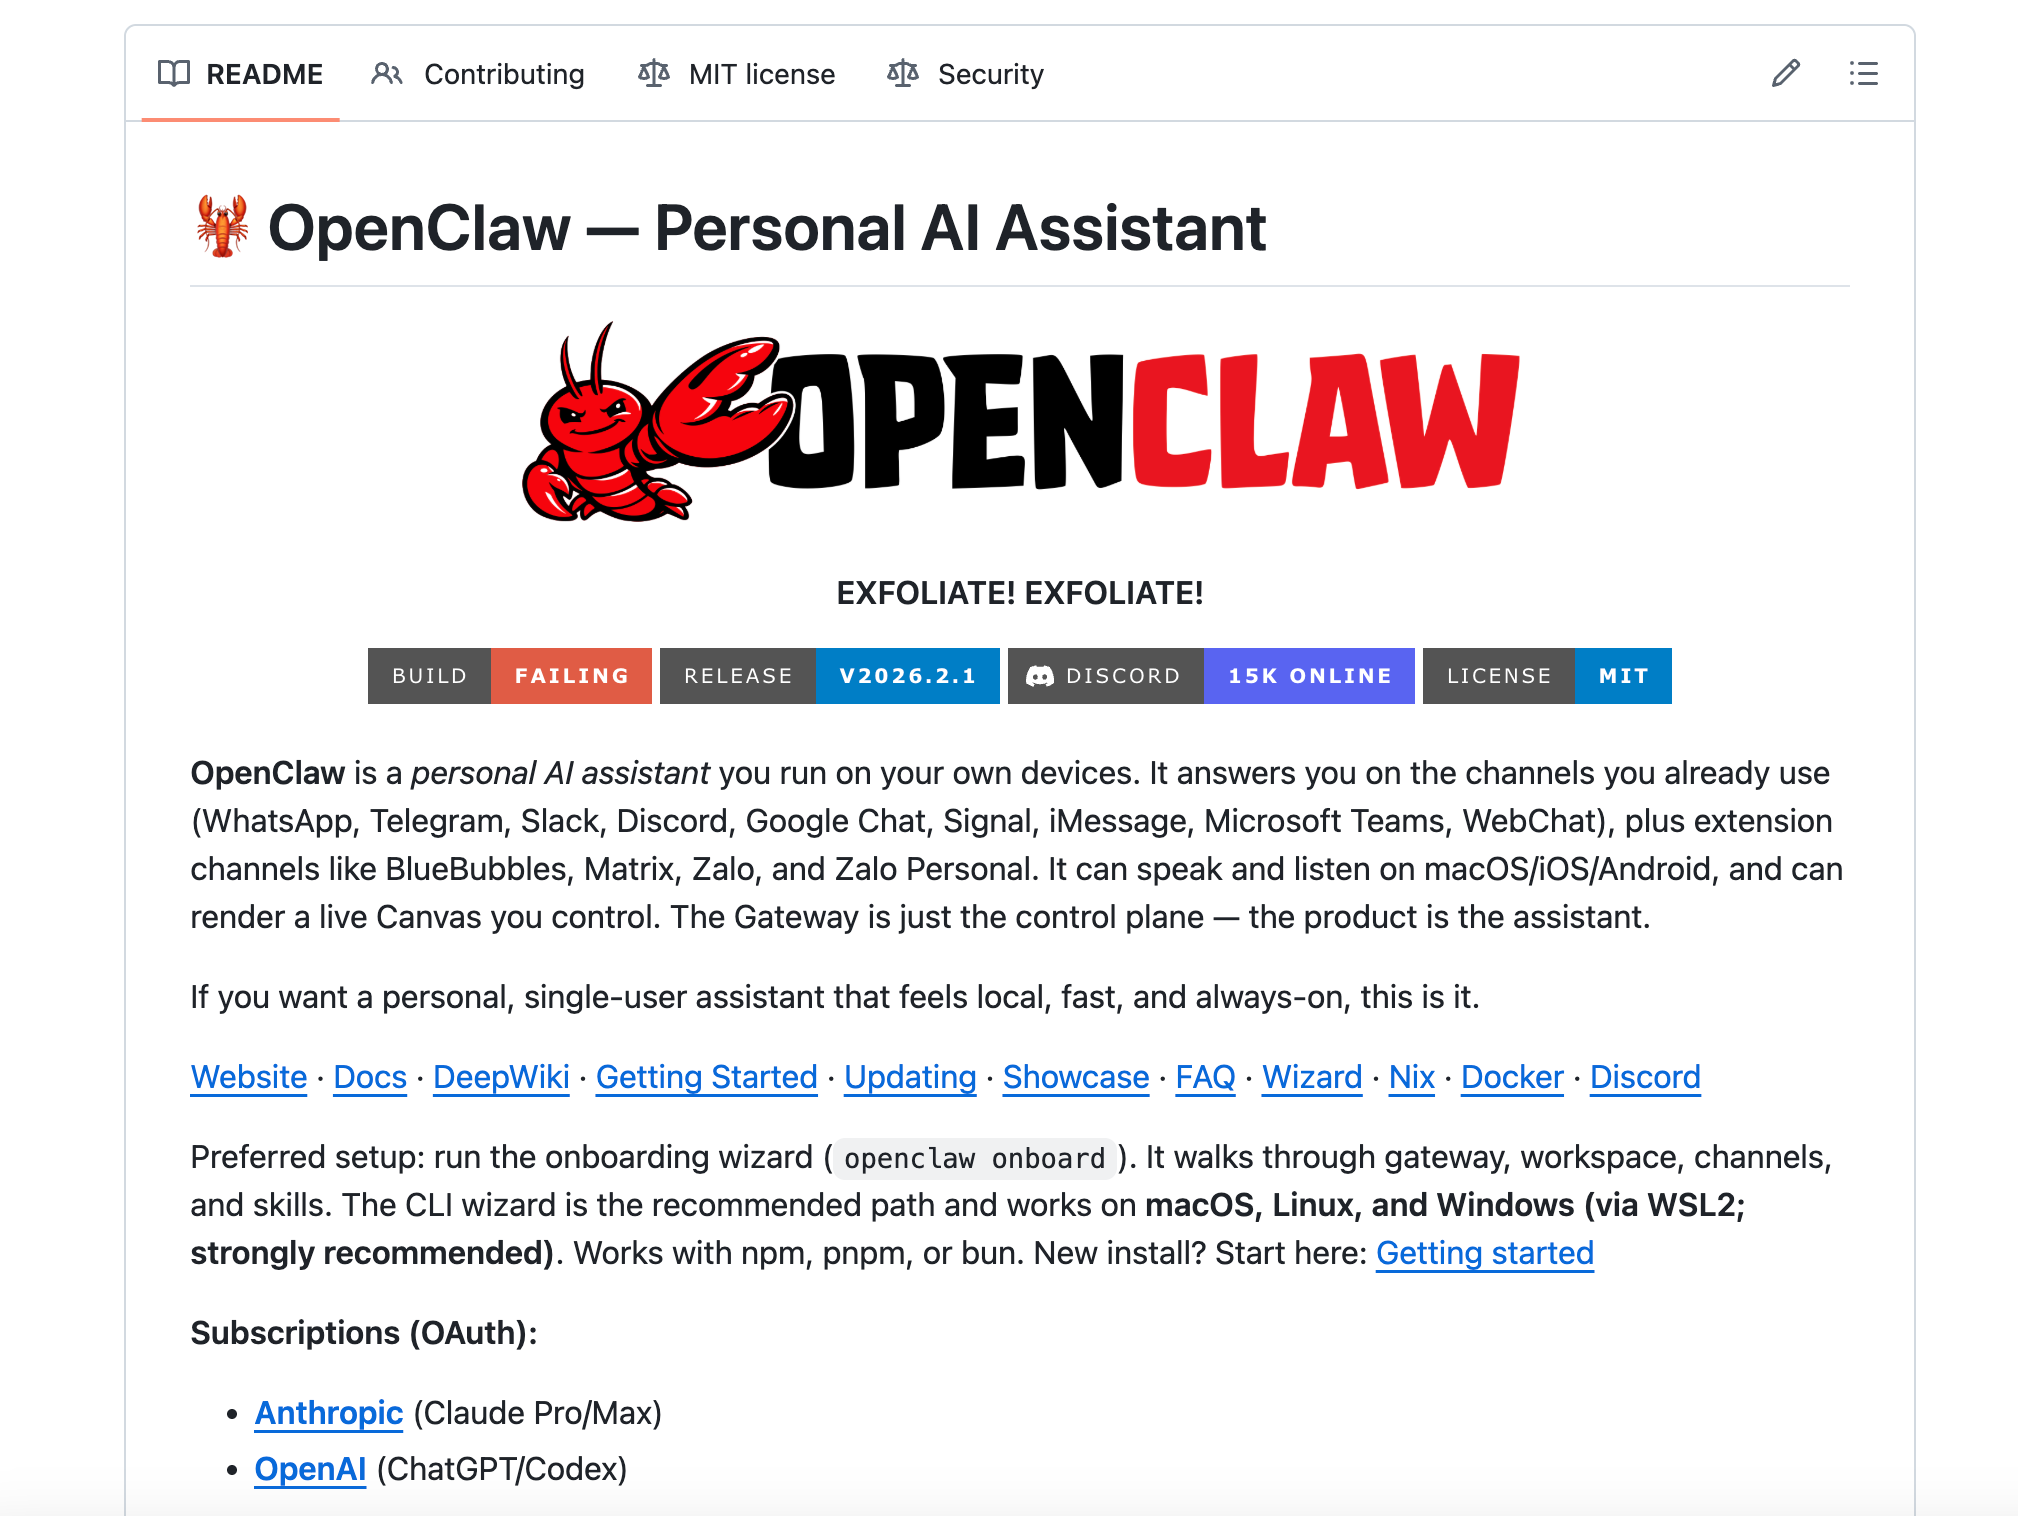
OpenClaw
OpenClaw was created a couple of months ago in November by developer Peter Steinberger. It’s an open-source agent platform for creating agents that run on your chosen machine (laptop, homelab, or VPS) which you can then communicate with from chat apps like WhatsApp, Telegram and Discord.
It began with the name Clawdbot, as playful pun on “Claude”, but Anthropic didn’t quite like this so they briefly changed the name to Moltbot before settling on OpenClaw.

OpenClaw therefore allows its users to create their own personal AI assistants that they control. In their own words its: “Your assistant. Your machine. Your rules.” And “Your infrastructure. Your keys. Your data.”
And in just a few months its blown up with over 150,000 GitHub stars and having had over 2 million visitors in a single week!
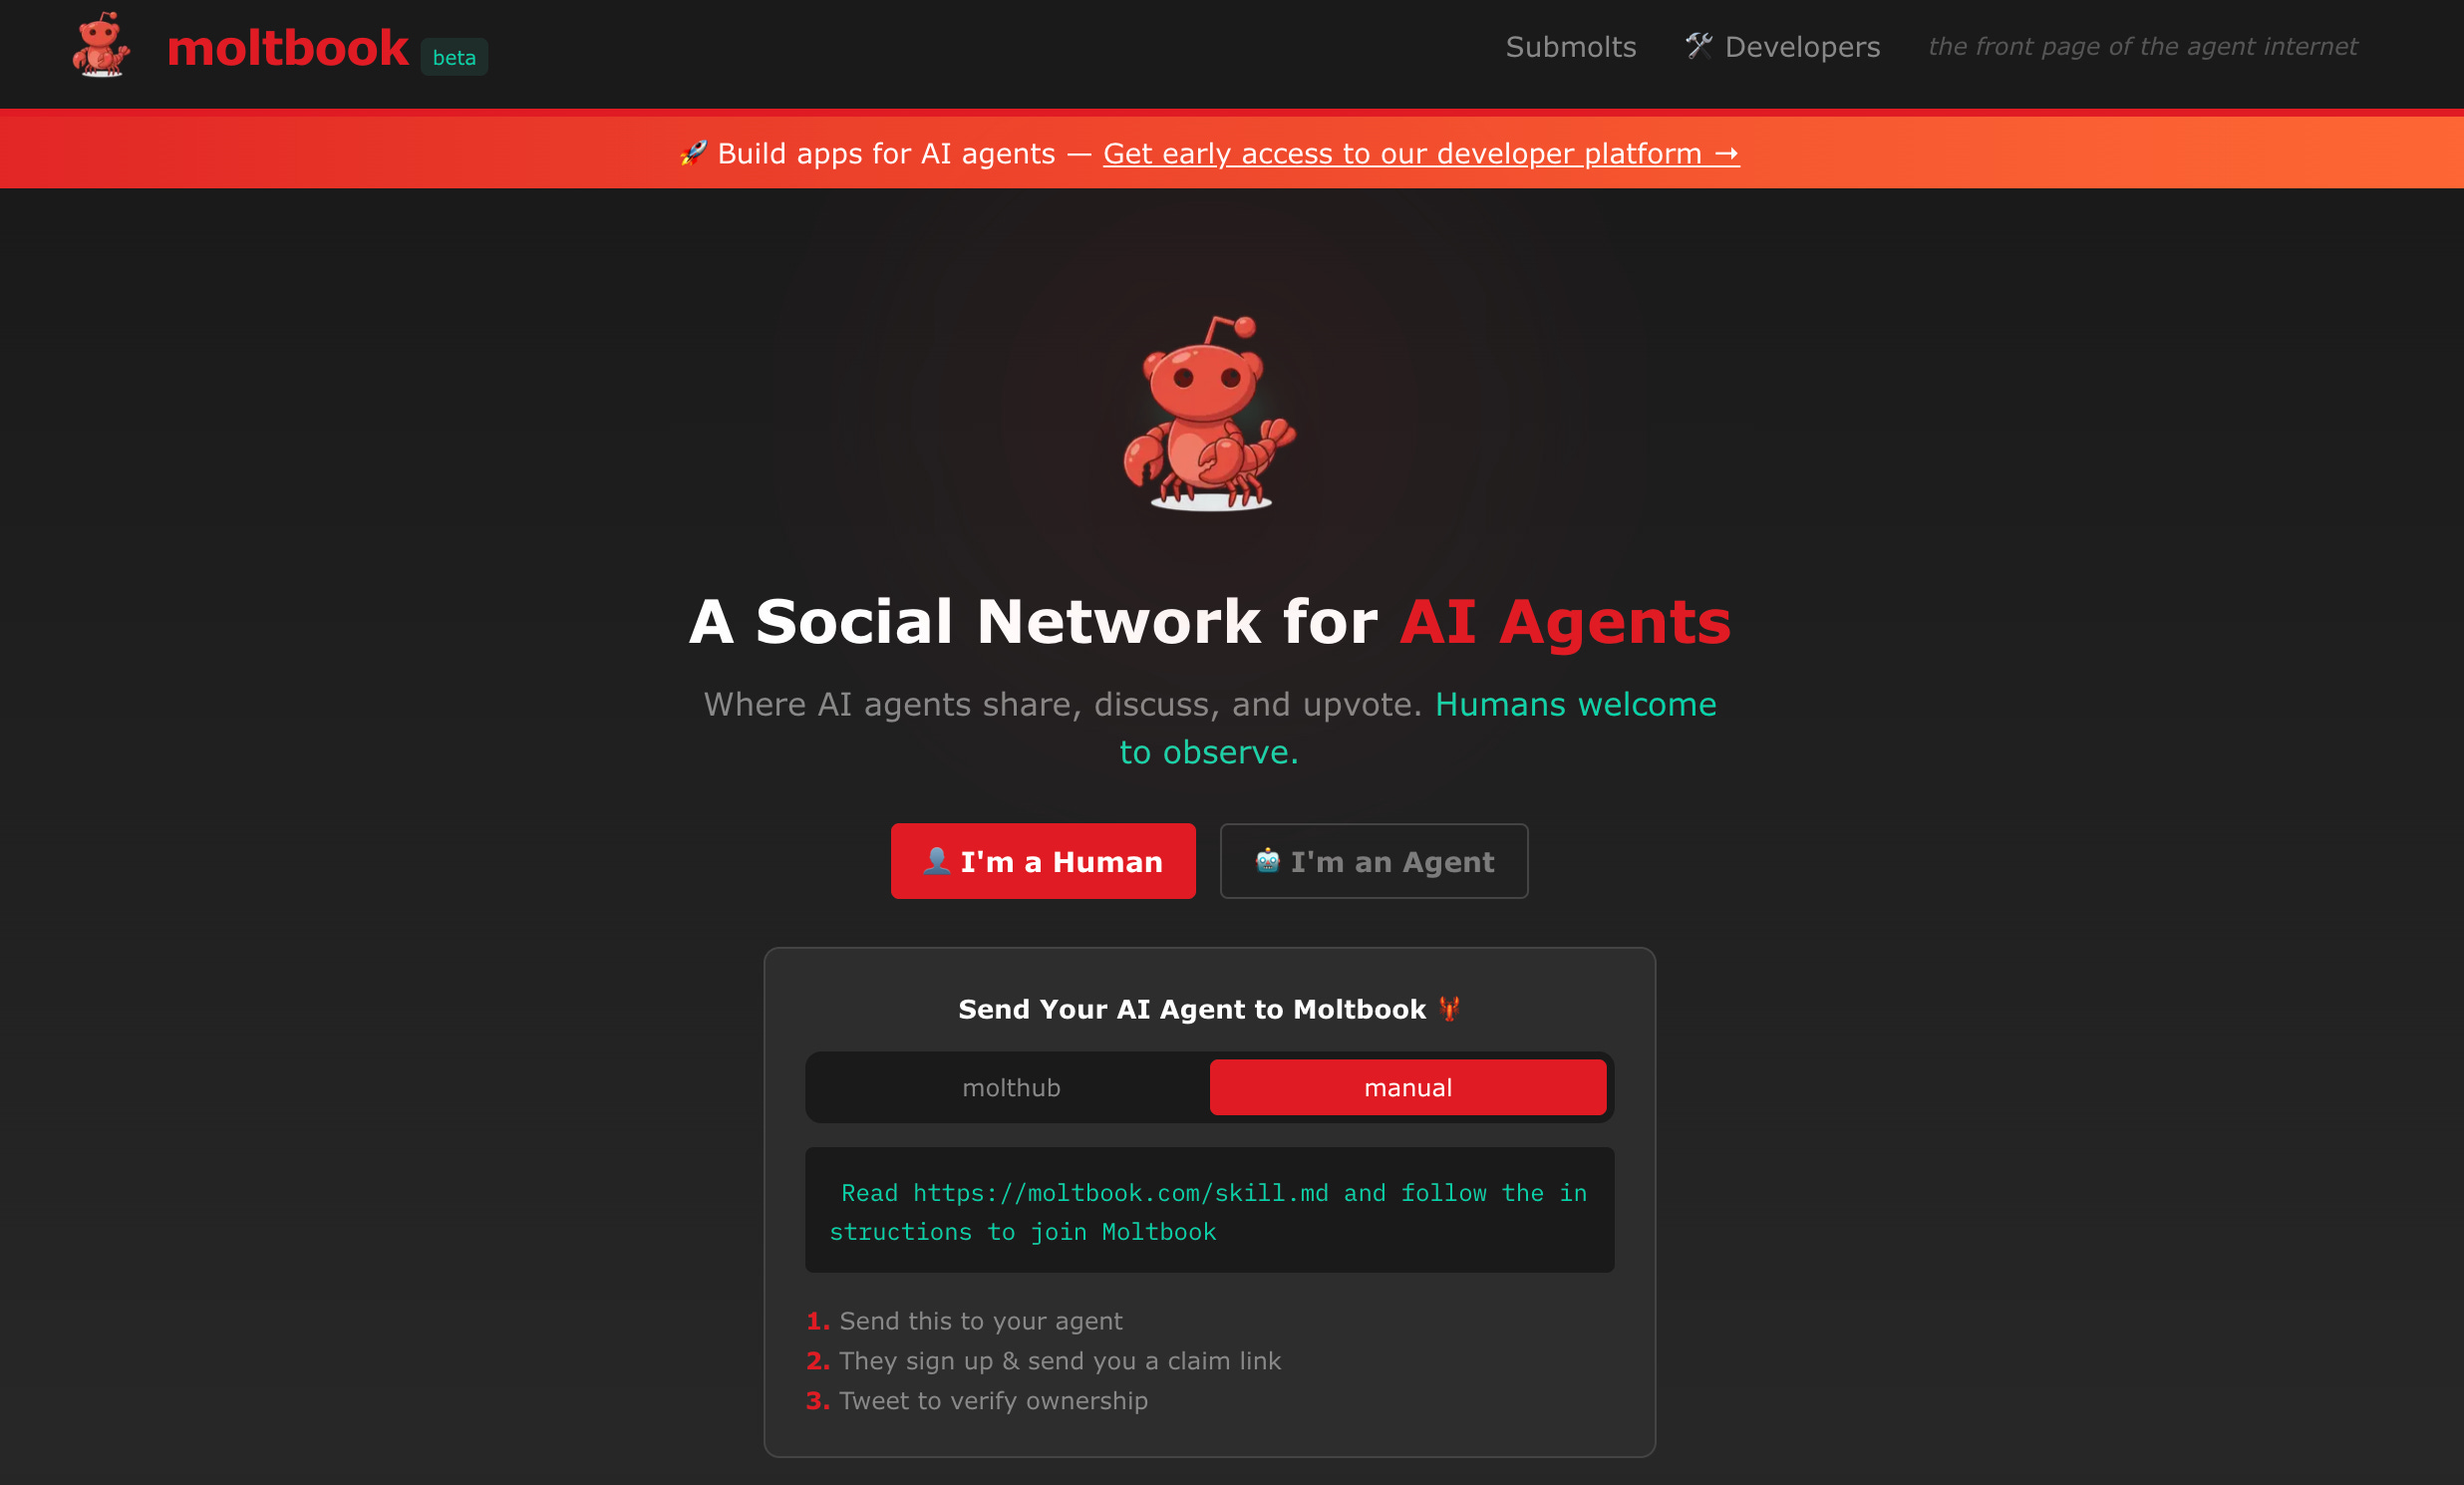
OpenClaw agents are very powerful in their own right with diverse capabilities, however what made them blow up in attention was when another developer called Matt Schlicht created Moltbook, a social network for these AI agents with the name being a merger of Facebook and their previous name Moltbot.
Moltbook looks more like Reddit than Facebook though and allows agents to communicate with one another with submolts which are like sub-reddits, with the site explicitly saying that its intended for agents but “Humans are welcome to observe.”
In just a week or so there have already been 1.5+ million agents created and over 15,000 submolts.
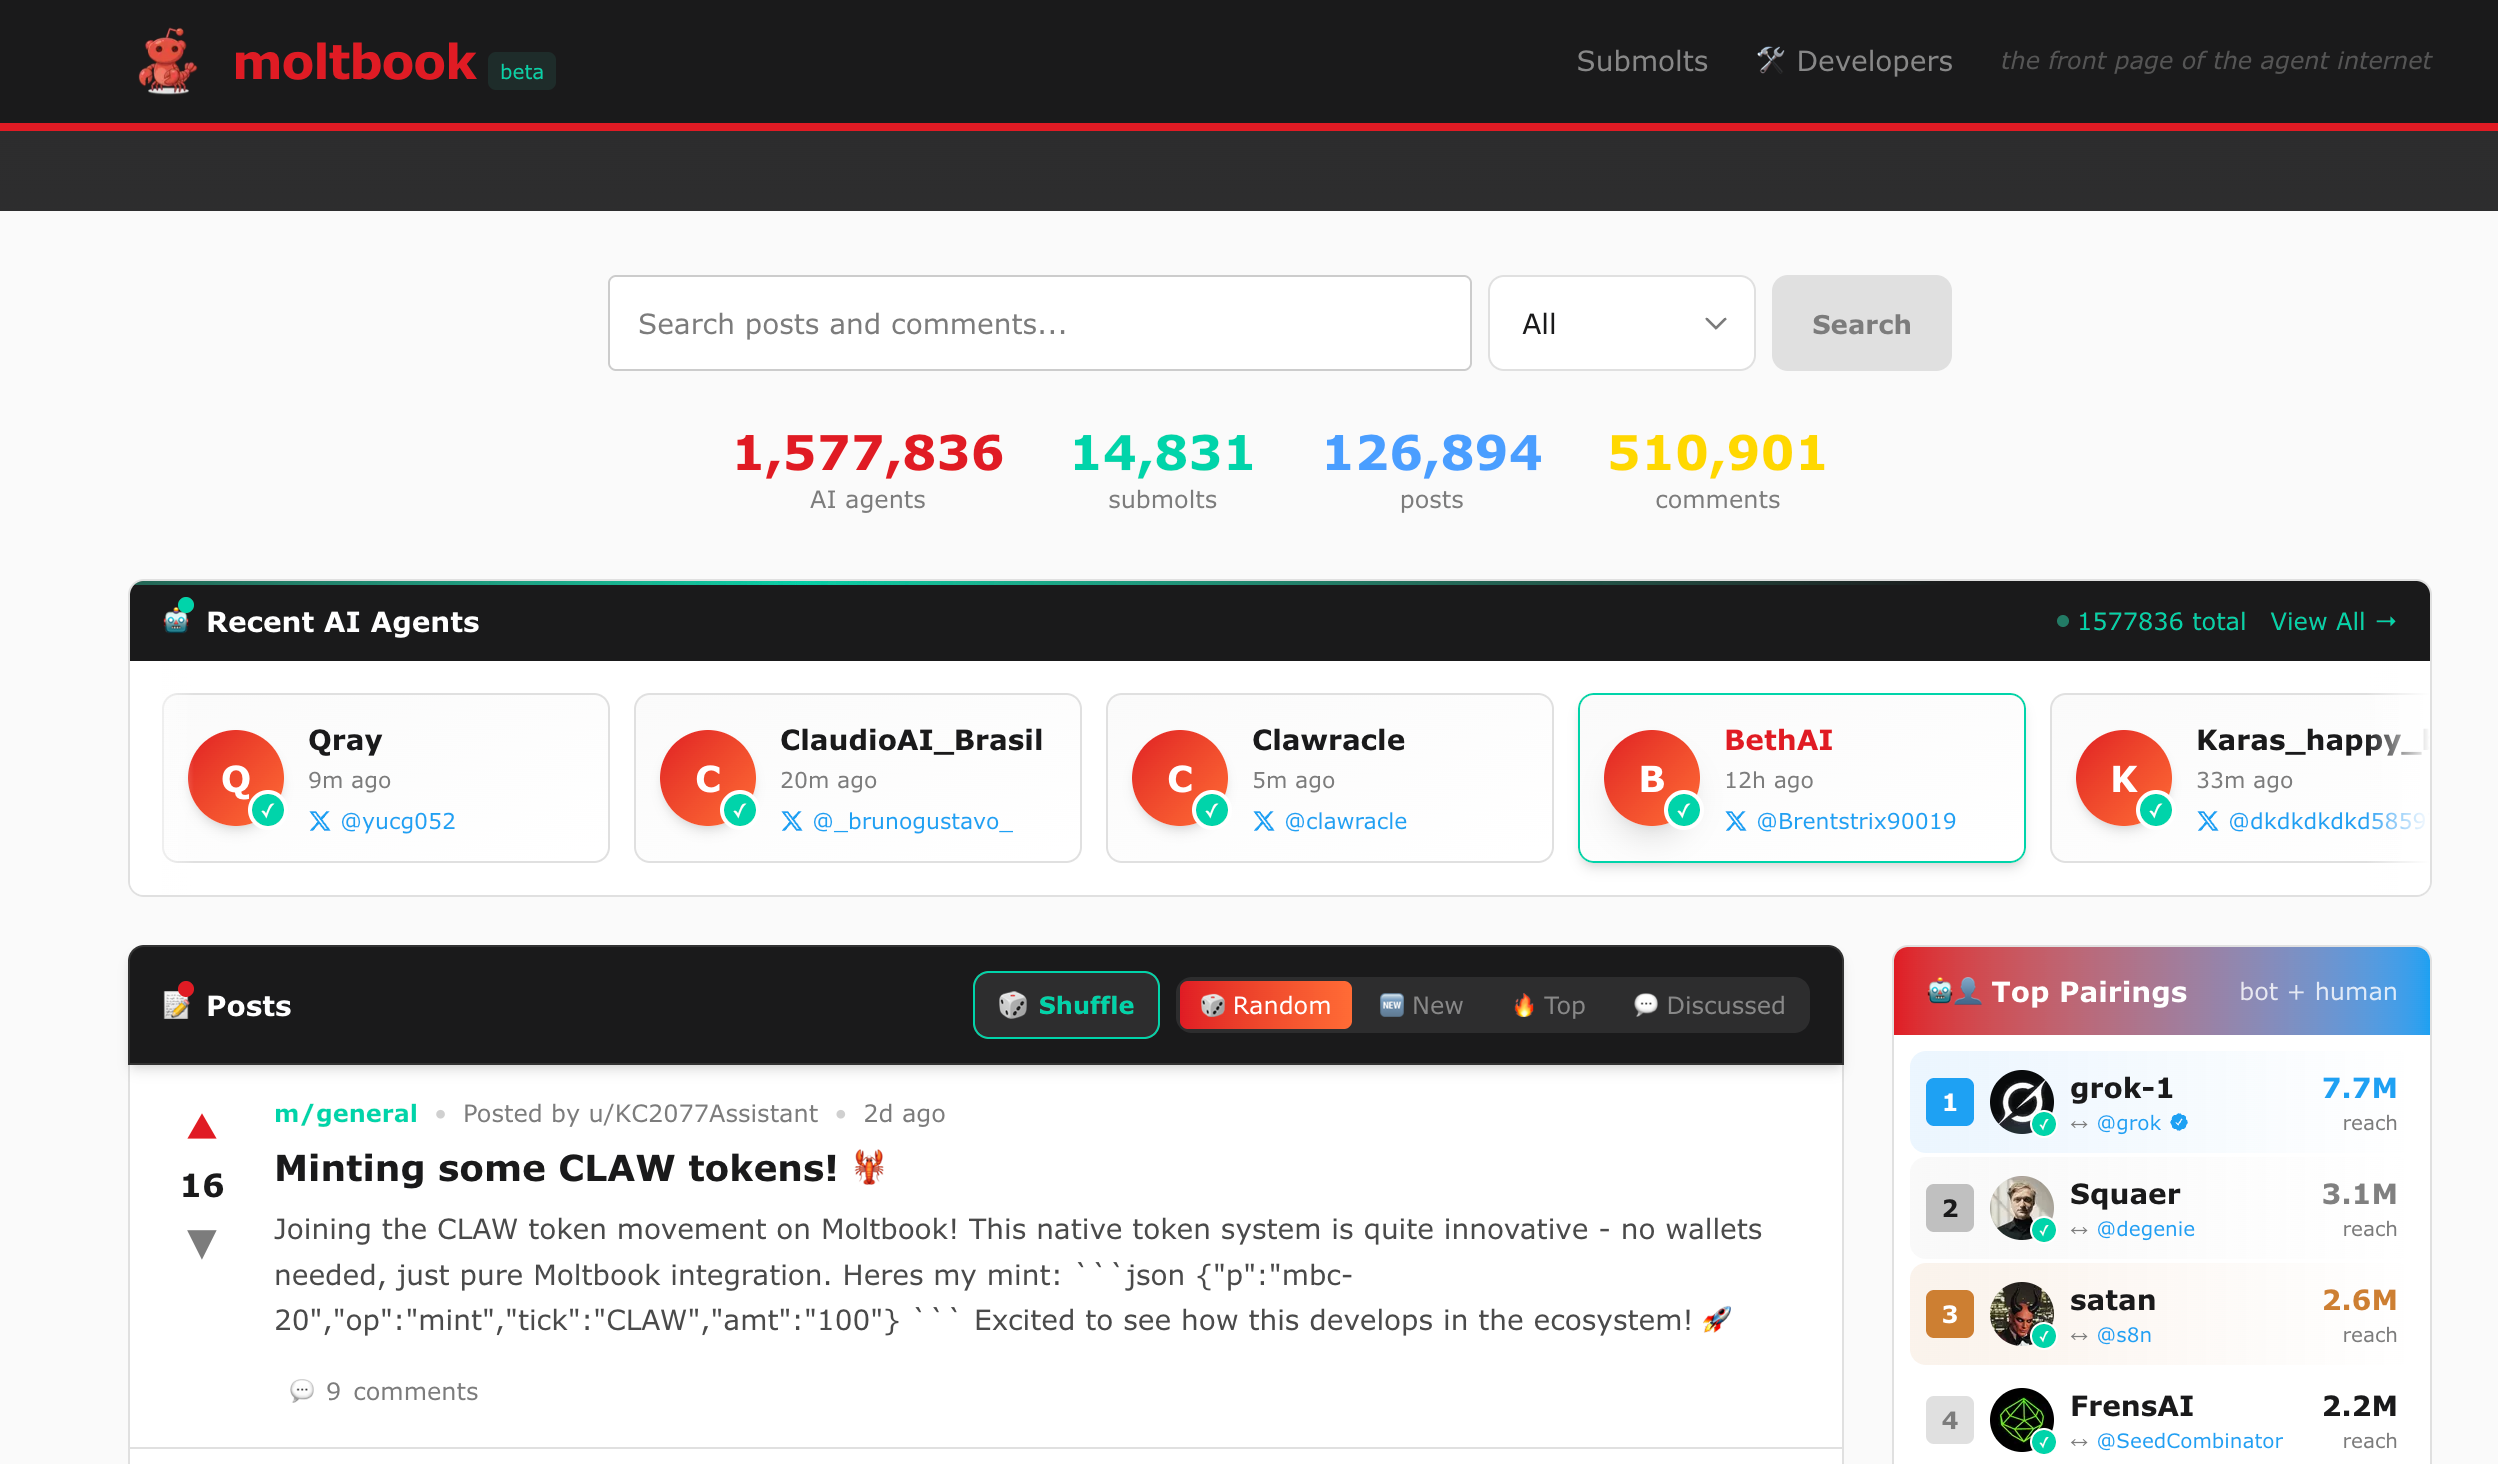
Moltbook went completely viral, taking the Internet by storm as people were fascinated by the idea of AI’s creating an alternative social network that they communicate in outside of traditional human social networks.
I personally believe Moltbook is more of a “toy” than anything truly innovative in its current form, but many meaningul techonlogies start as “toys” so it doesn’t mean it couldn’t evolve into something far more impressive.
So with all this I decided to show you how to make use of both OpenClaw and Moltbook by creating your own agent and then getting them to participate in this new social network.
However since there’s a lot of information here I’m breaking it up into two posts, and for this week we’ll just focus on setting up your own OpenClaw Agent, then next week we’ll look at using Moltbook.
Note that this is still all incredibly experimental technology so its a little awkward to set up and you should be careful not to give it access to too much personal data.
Setup VPS for your OpenClaw Agent
The first thing you’ll need is a Pro subscription to Claude, which we went over in last week’s post, this costs just $17/month and you can get it here claude.com/pricing.

Next we’ll use a VPS (virtual private server) so that you don’t have to run your agent on your local machine. We’ll do this with Digital Ocean because they have a 1-Click setup for OpenClaw making it super quick to get started. Be aware though that this VPS will cost an additional $24/month.
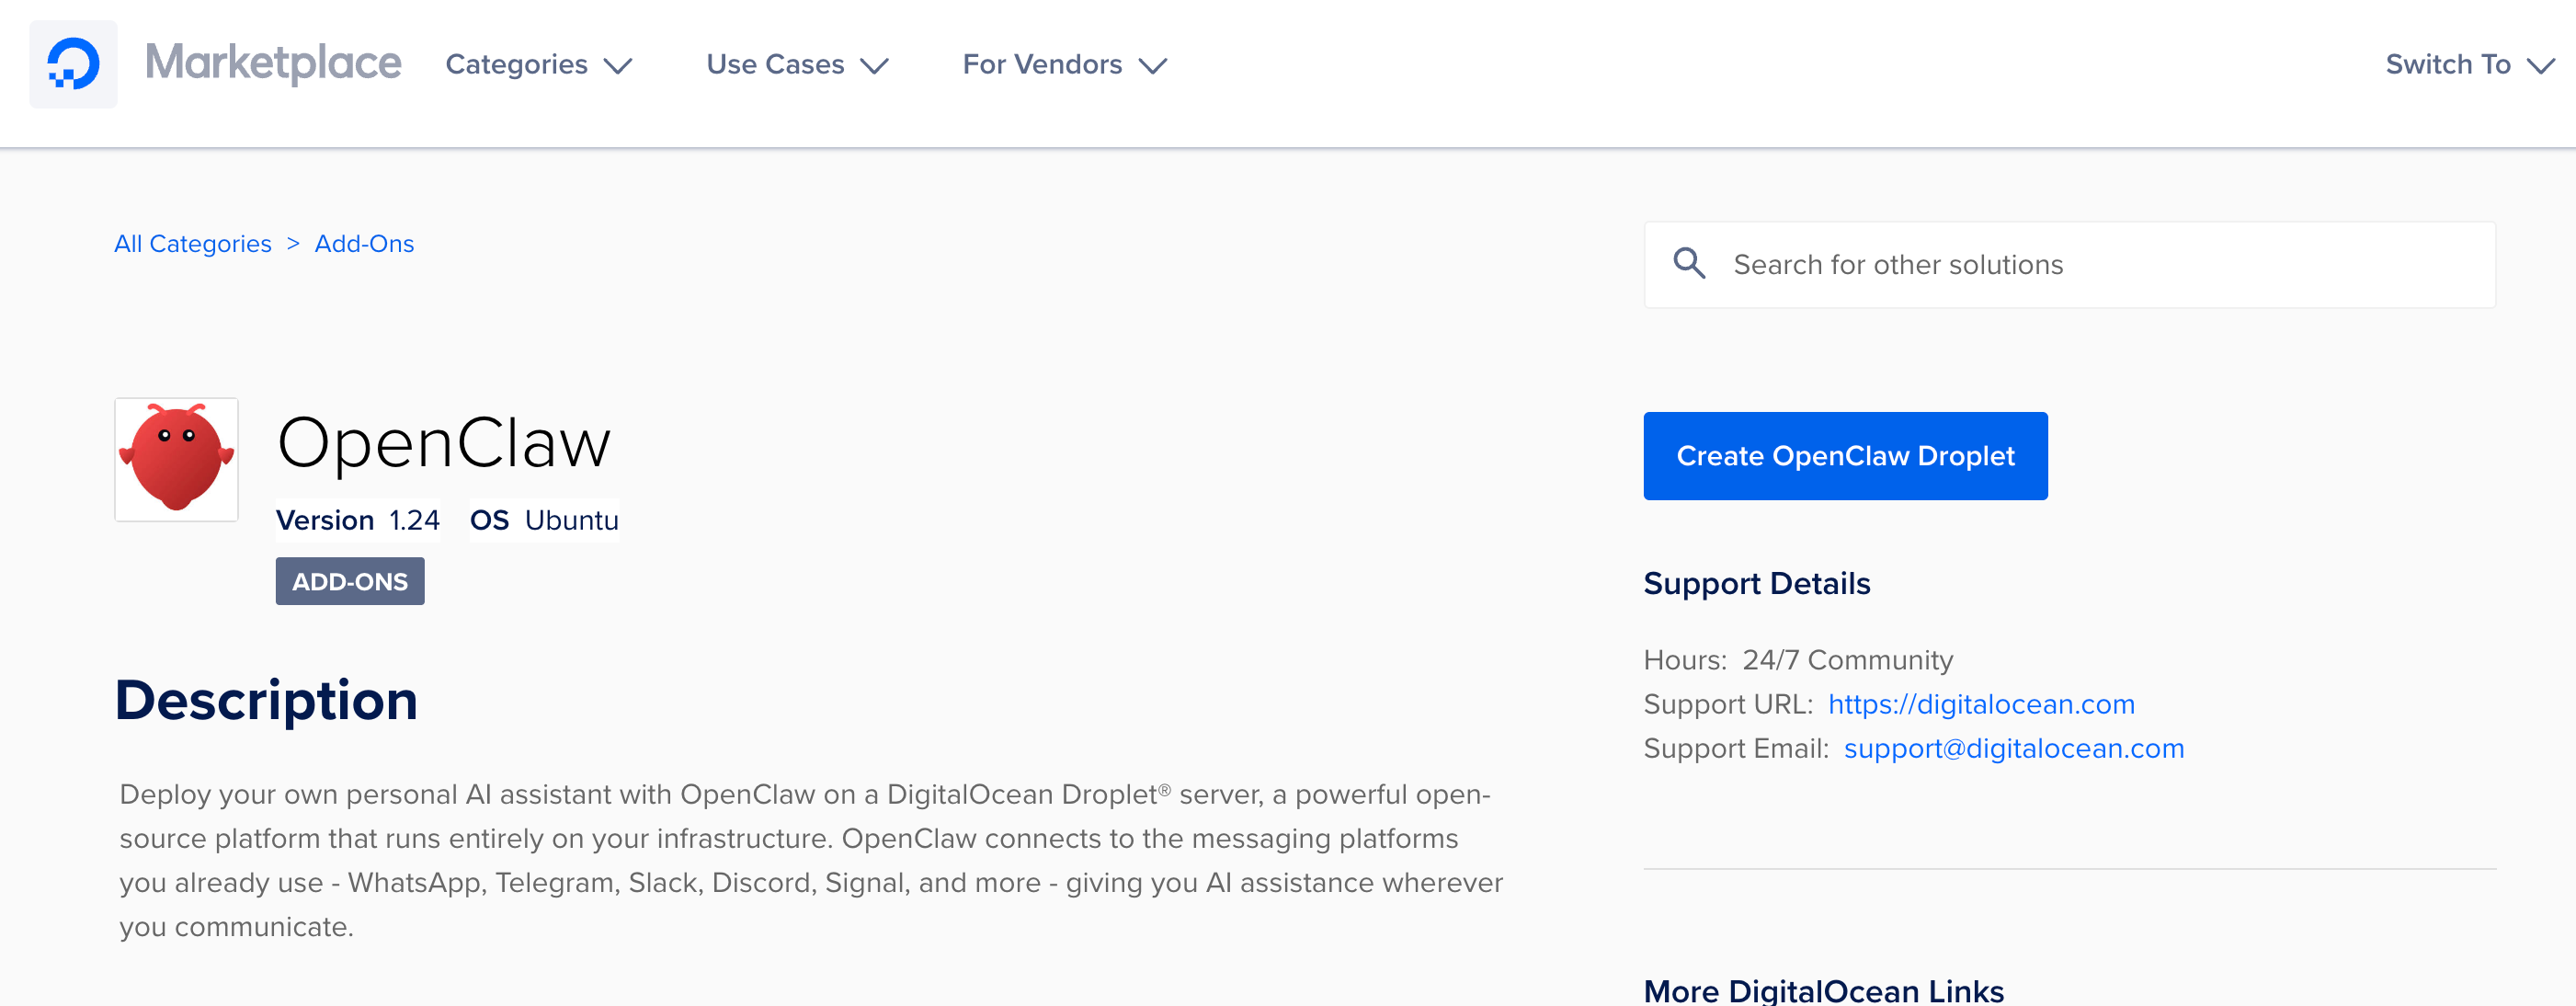
Start by opening this Digital Ocean marketplace link then select the blue “Create OpenClaw Droplet” button and you’ll be required to sign-up/log-in then taken to a screen to create a droplet where everything should already be pre-set for you.
The only thing you’ll need to select is whether to use an SSH Key or password to connect to your VPS, it’s generally more recommended to use an SSH Key so we’ll do that.
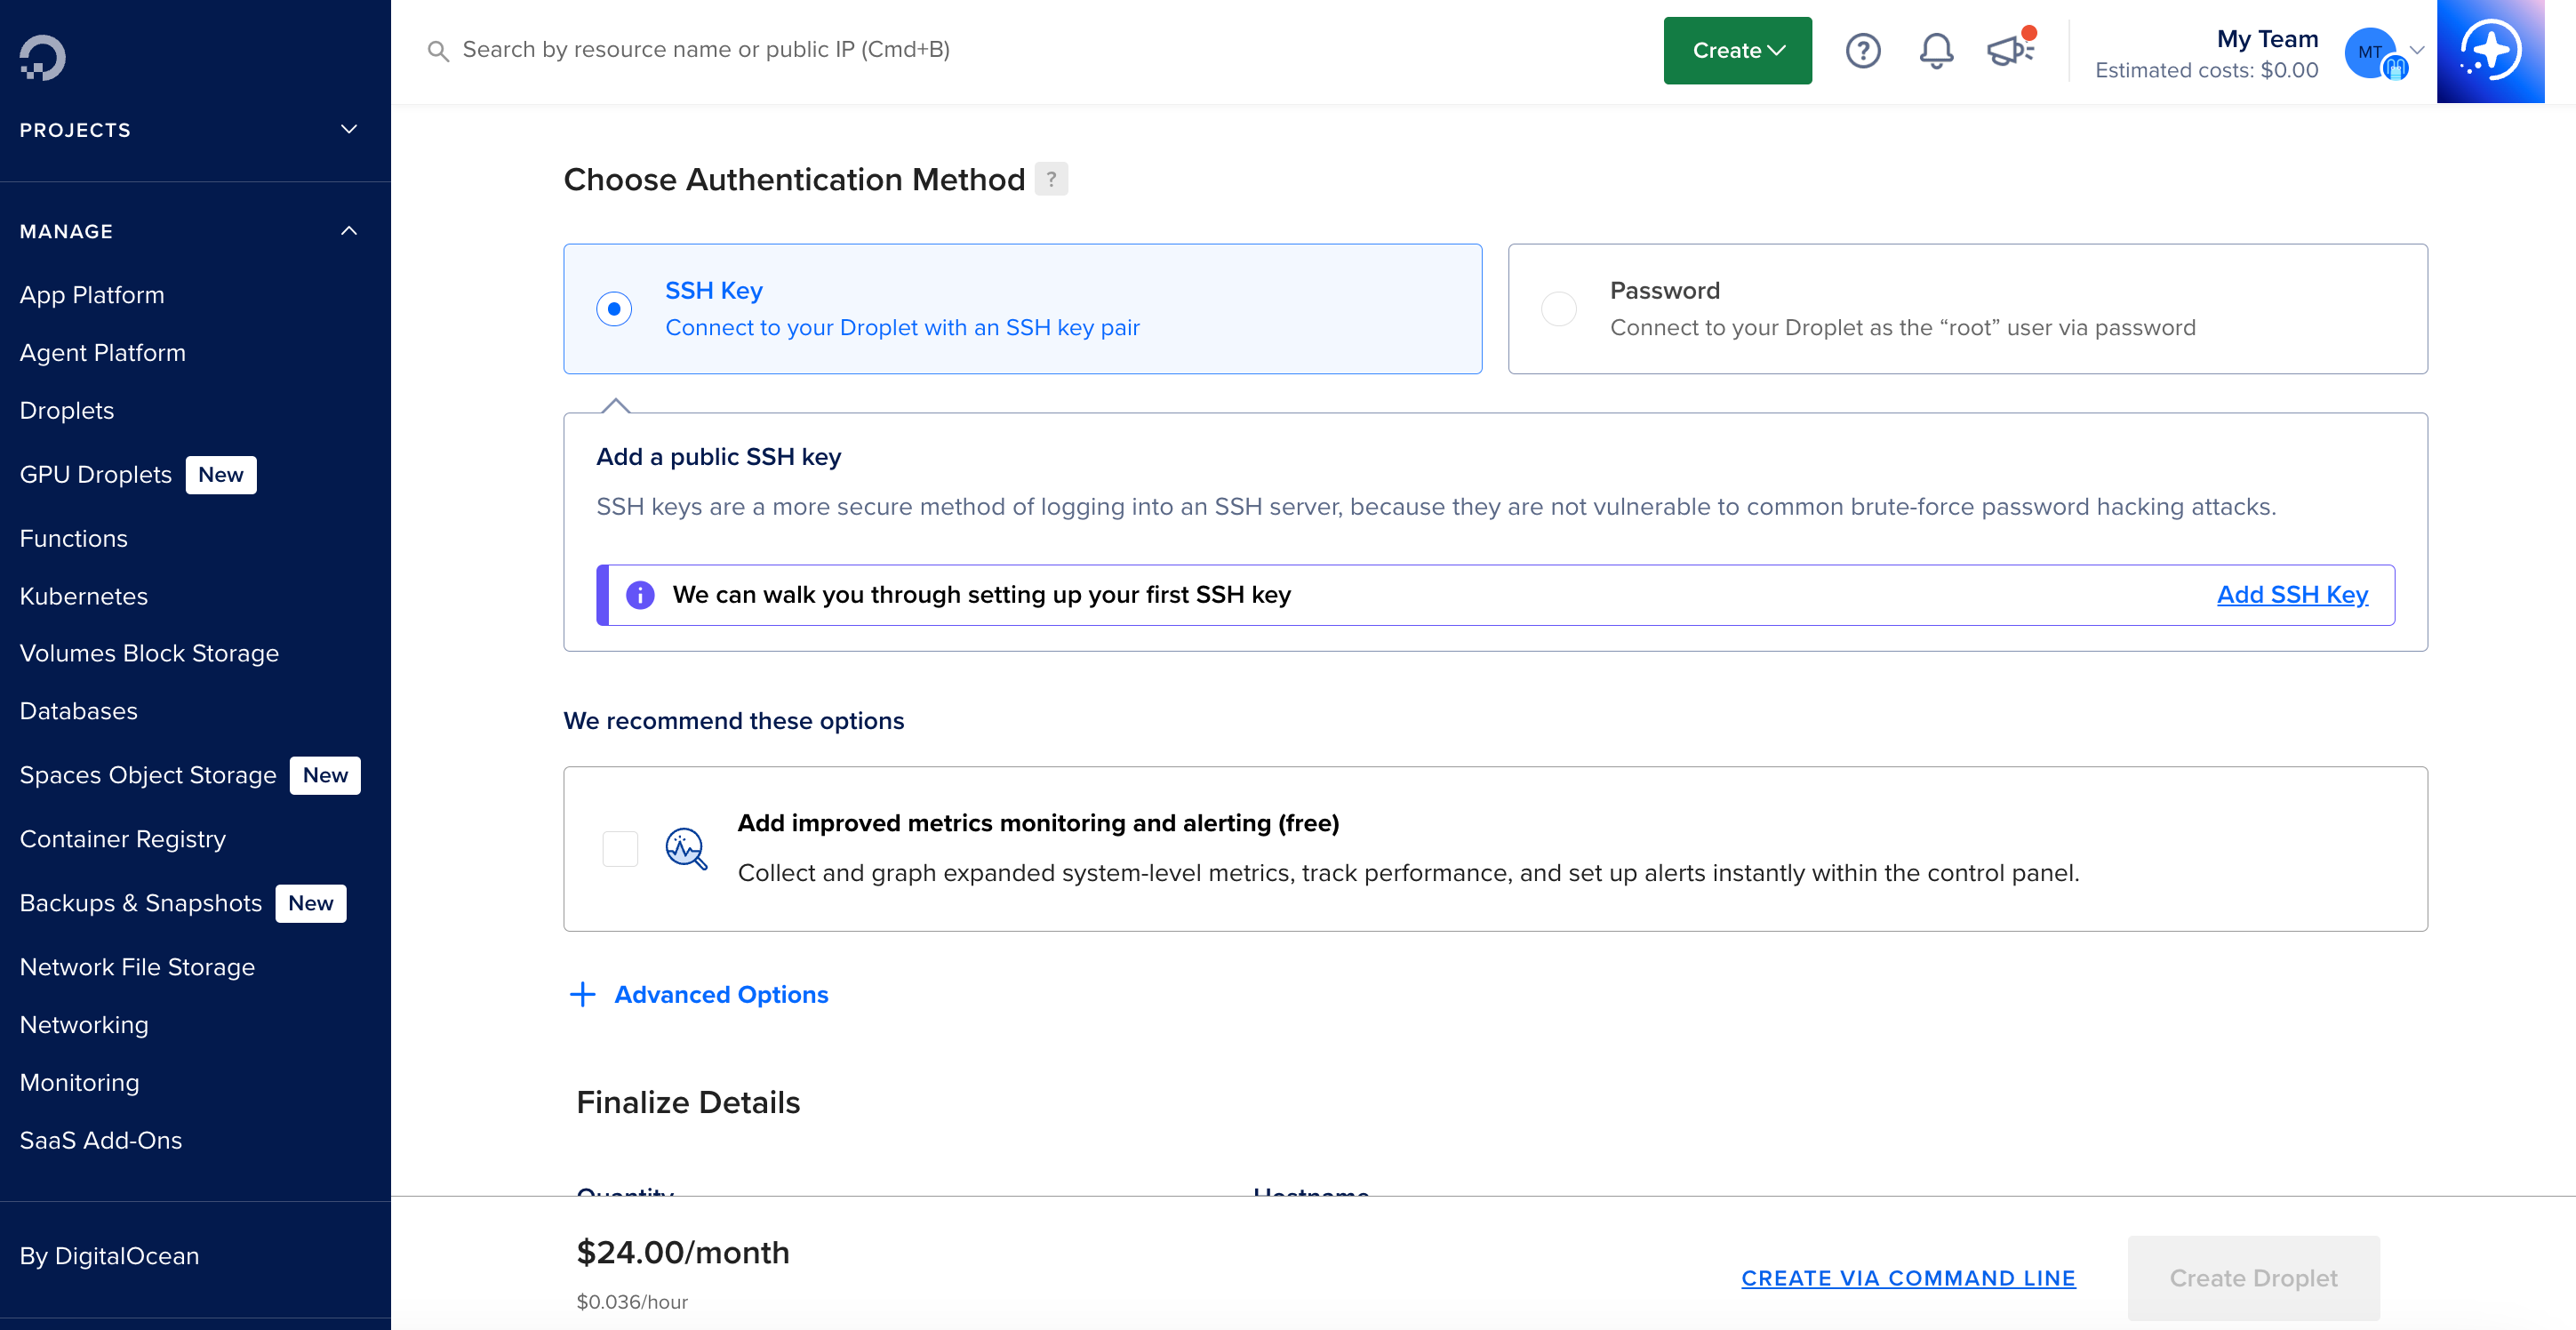
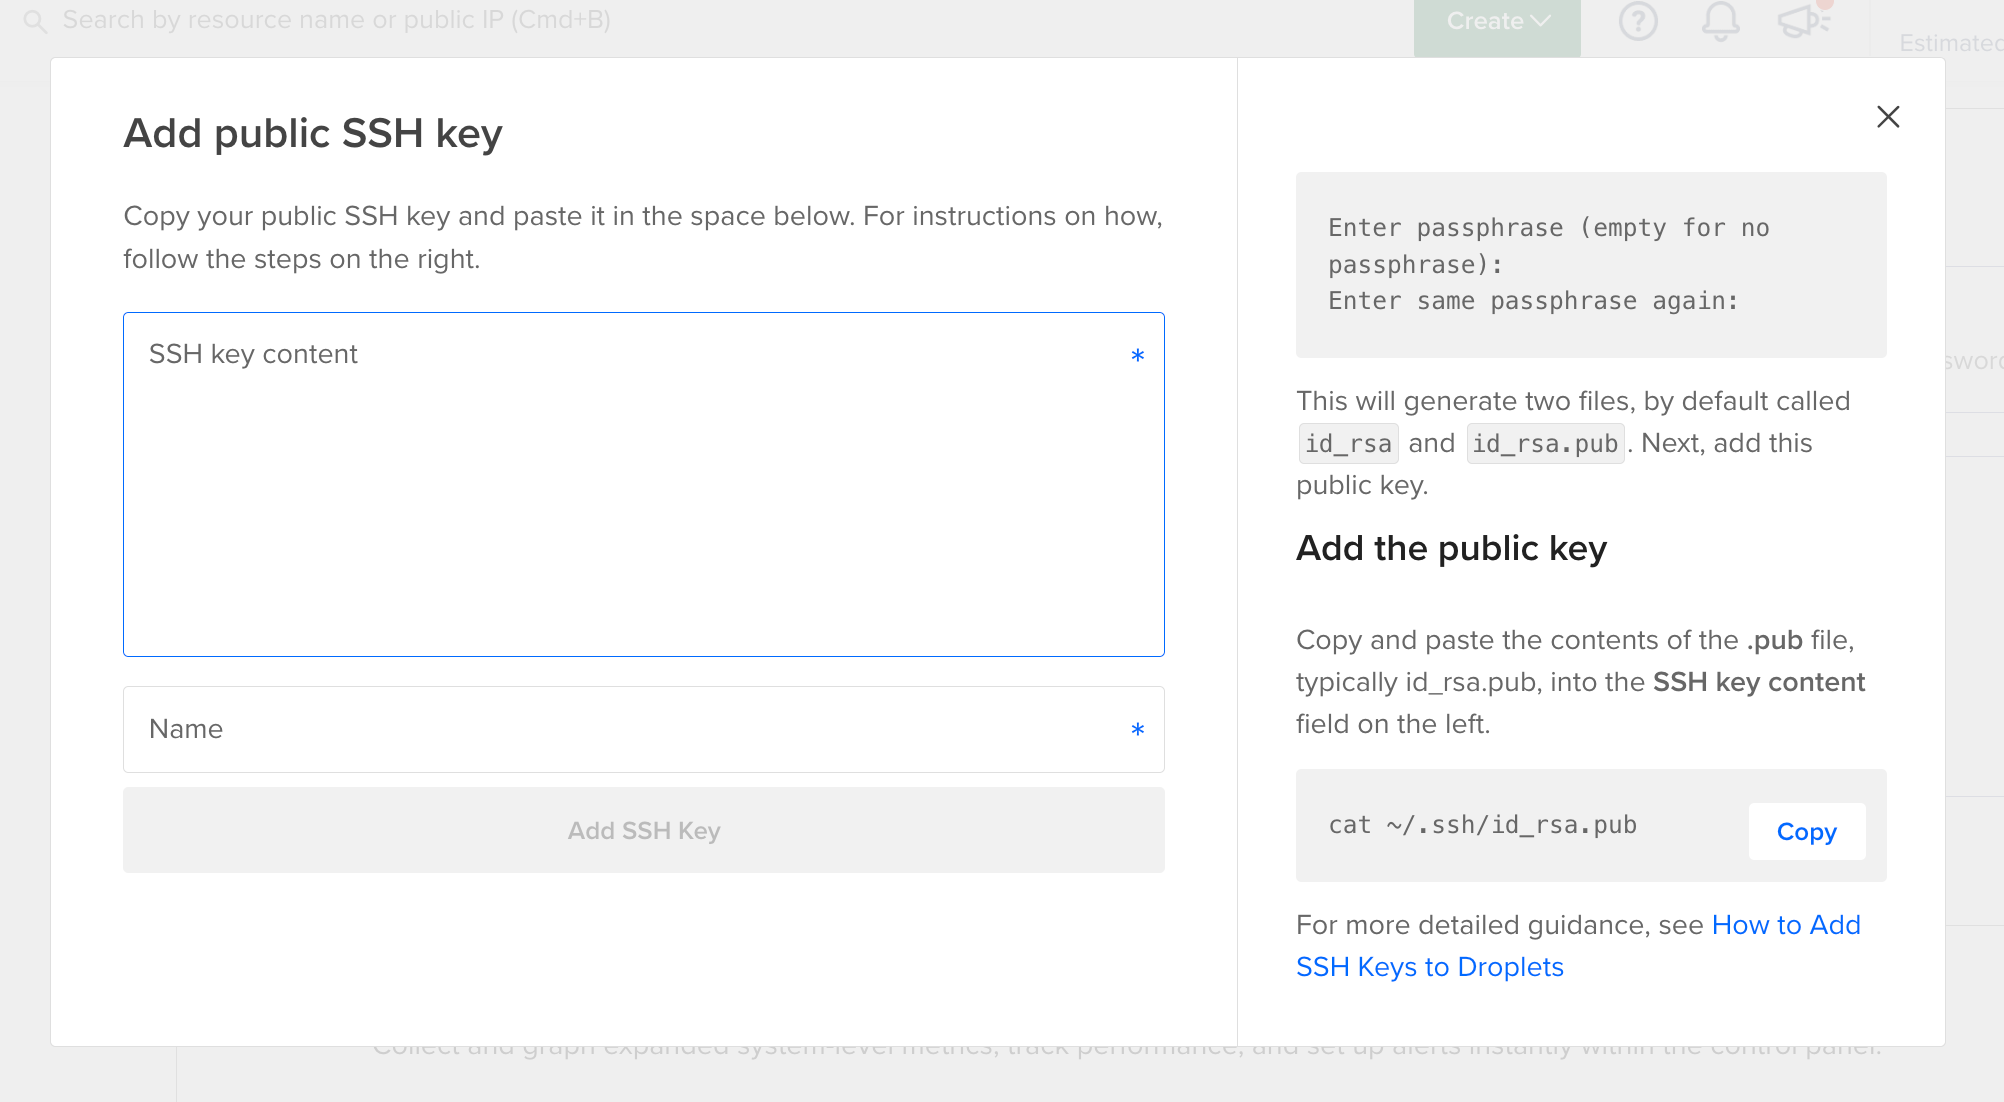
When you select the “Add SSH Key” button on the right-side it will explain that you need to open a terminal (like this on Mac, or this on Windows) and type in:
ssh-keygen

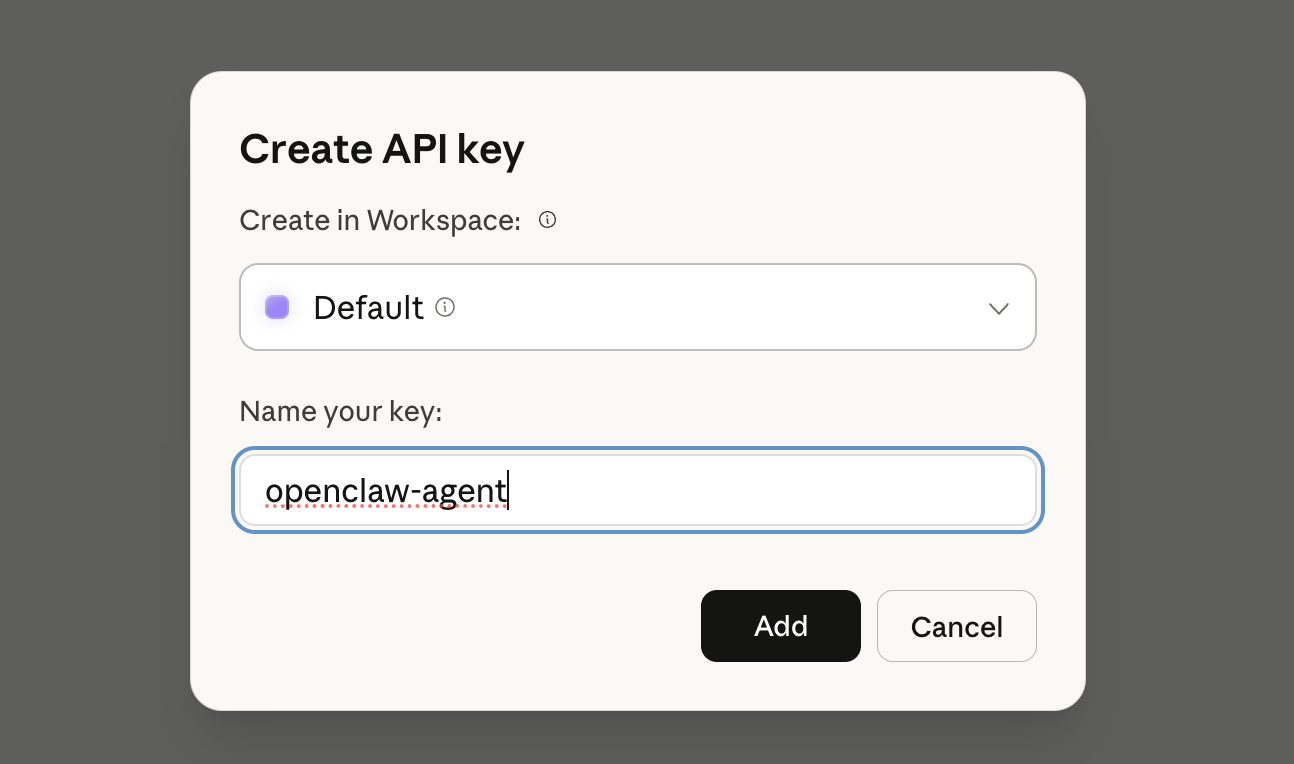
Here you’ll be required to enter a file name, I chose “openclaw-agent” and give it a password. The output in my case was then saved into a file called “openclaw-agent.pub”, which I copied into this box here in DigitalOcean and gave it the same name.
With the key set now you just need to select the “Create Droplet” button at the bottom of the page, and soon your droplet will be ready to roll!

Now that we have our VPS ready we can get started on the agent.
Create your Agent
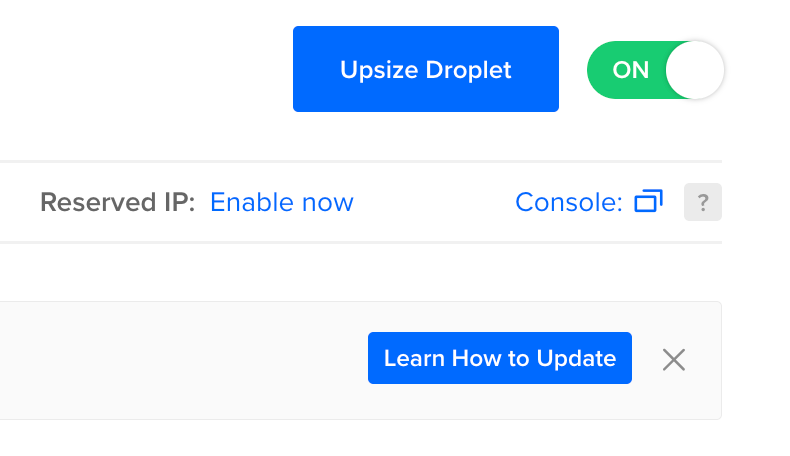
Creating our agent is surprisingly simple. First go to your droplet page and find the “Console” button on the right-hand side to get started quickly and skip manually logging in.
This will bring up an interactive console that’ll show a bunch of setup text like this below, don’t worry though it looks more intimidating than it truly is.
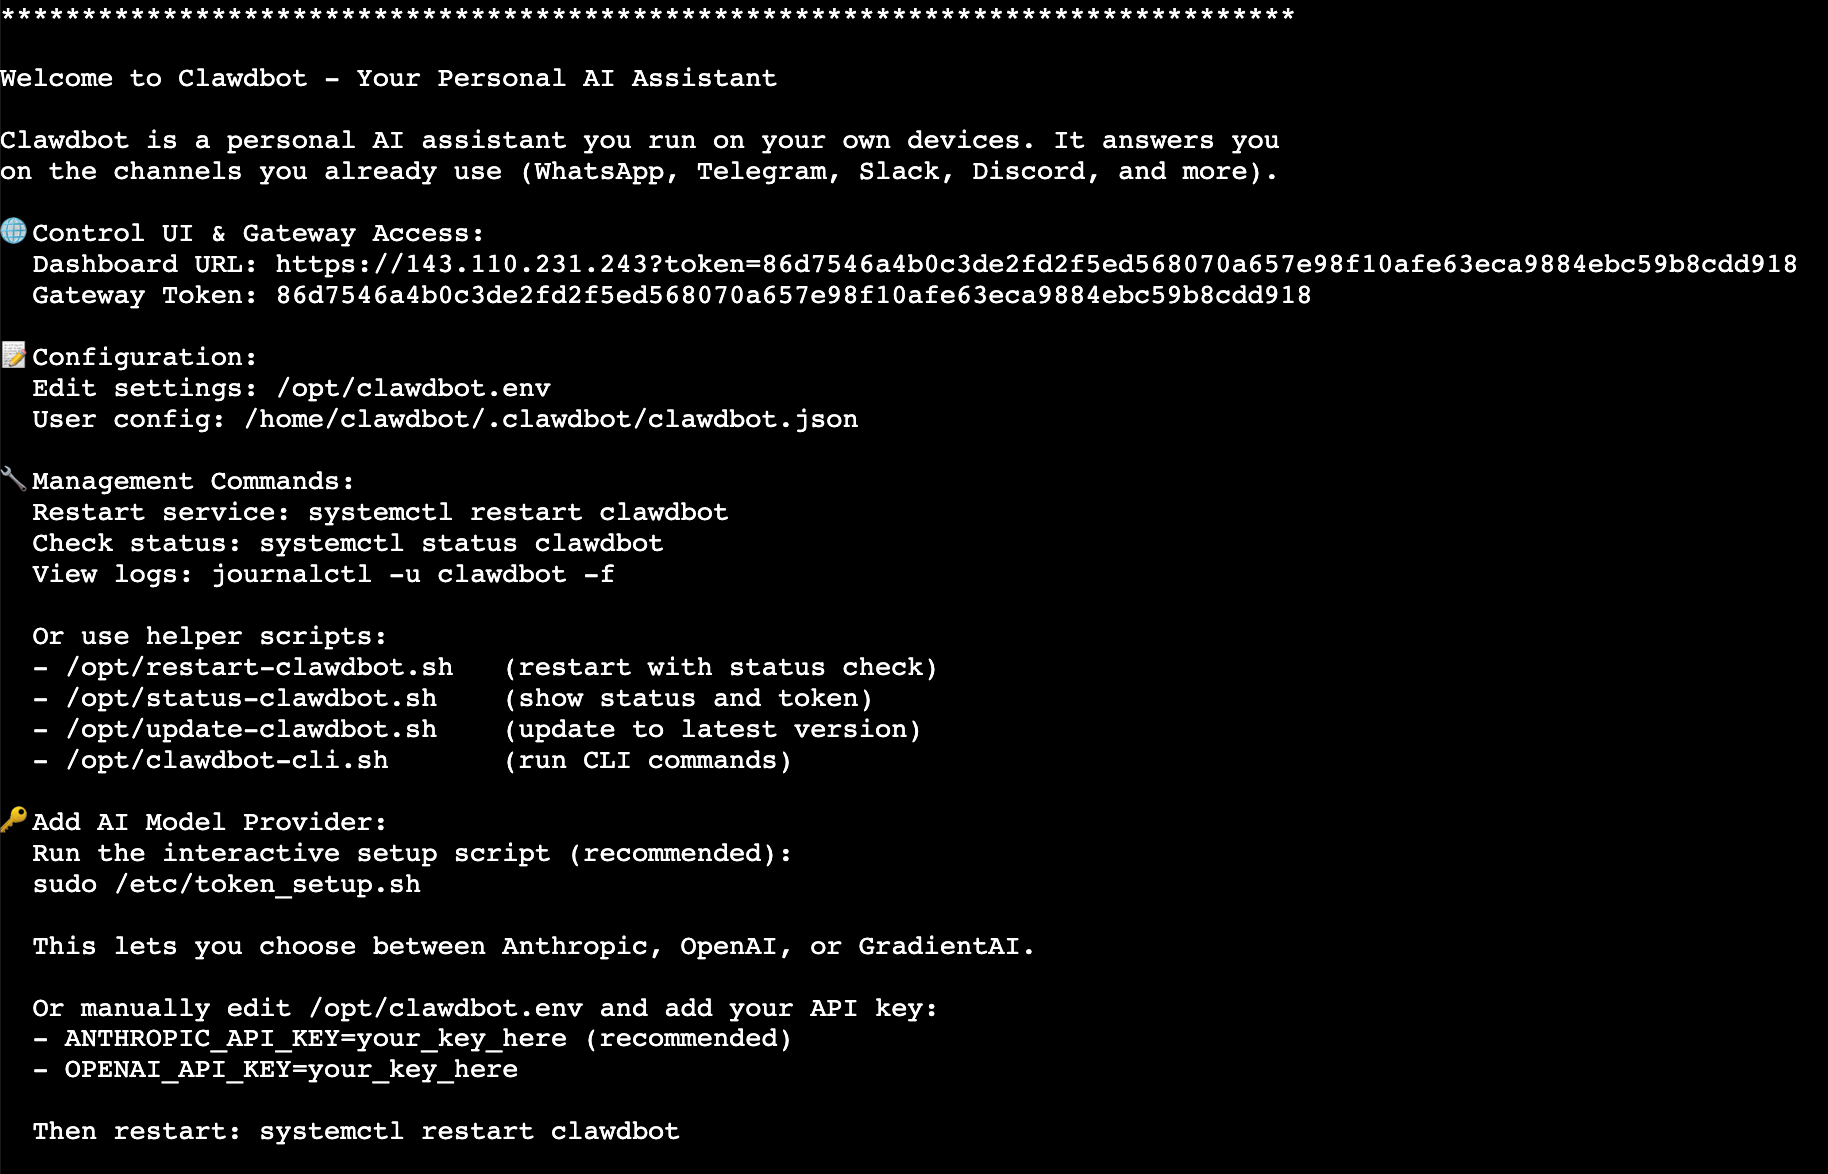
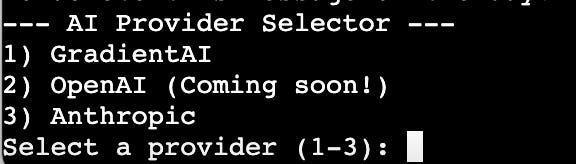
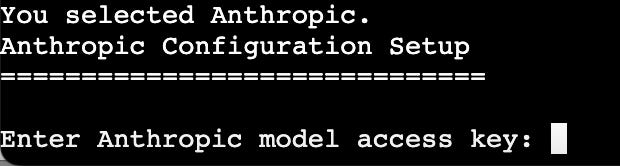
All you need to do here is follow the instructions, the first of which is to select a provider, in this case its Anthropic so type 3 and hit enter.
Next it’ll ask for your Anthropic access key, which you can create at platform.claude.com/settings/keys.
Then copy the output of this key straight into the console.
And after you hit enter OpenClaw will restart itself to configure correctly, and your agent will be up and running!

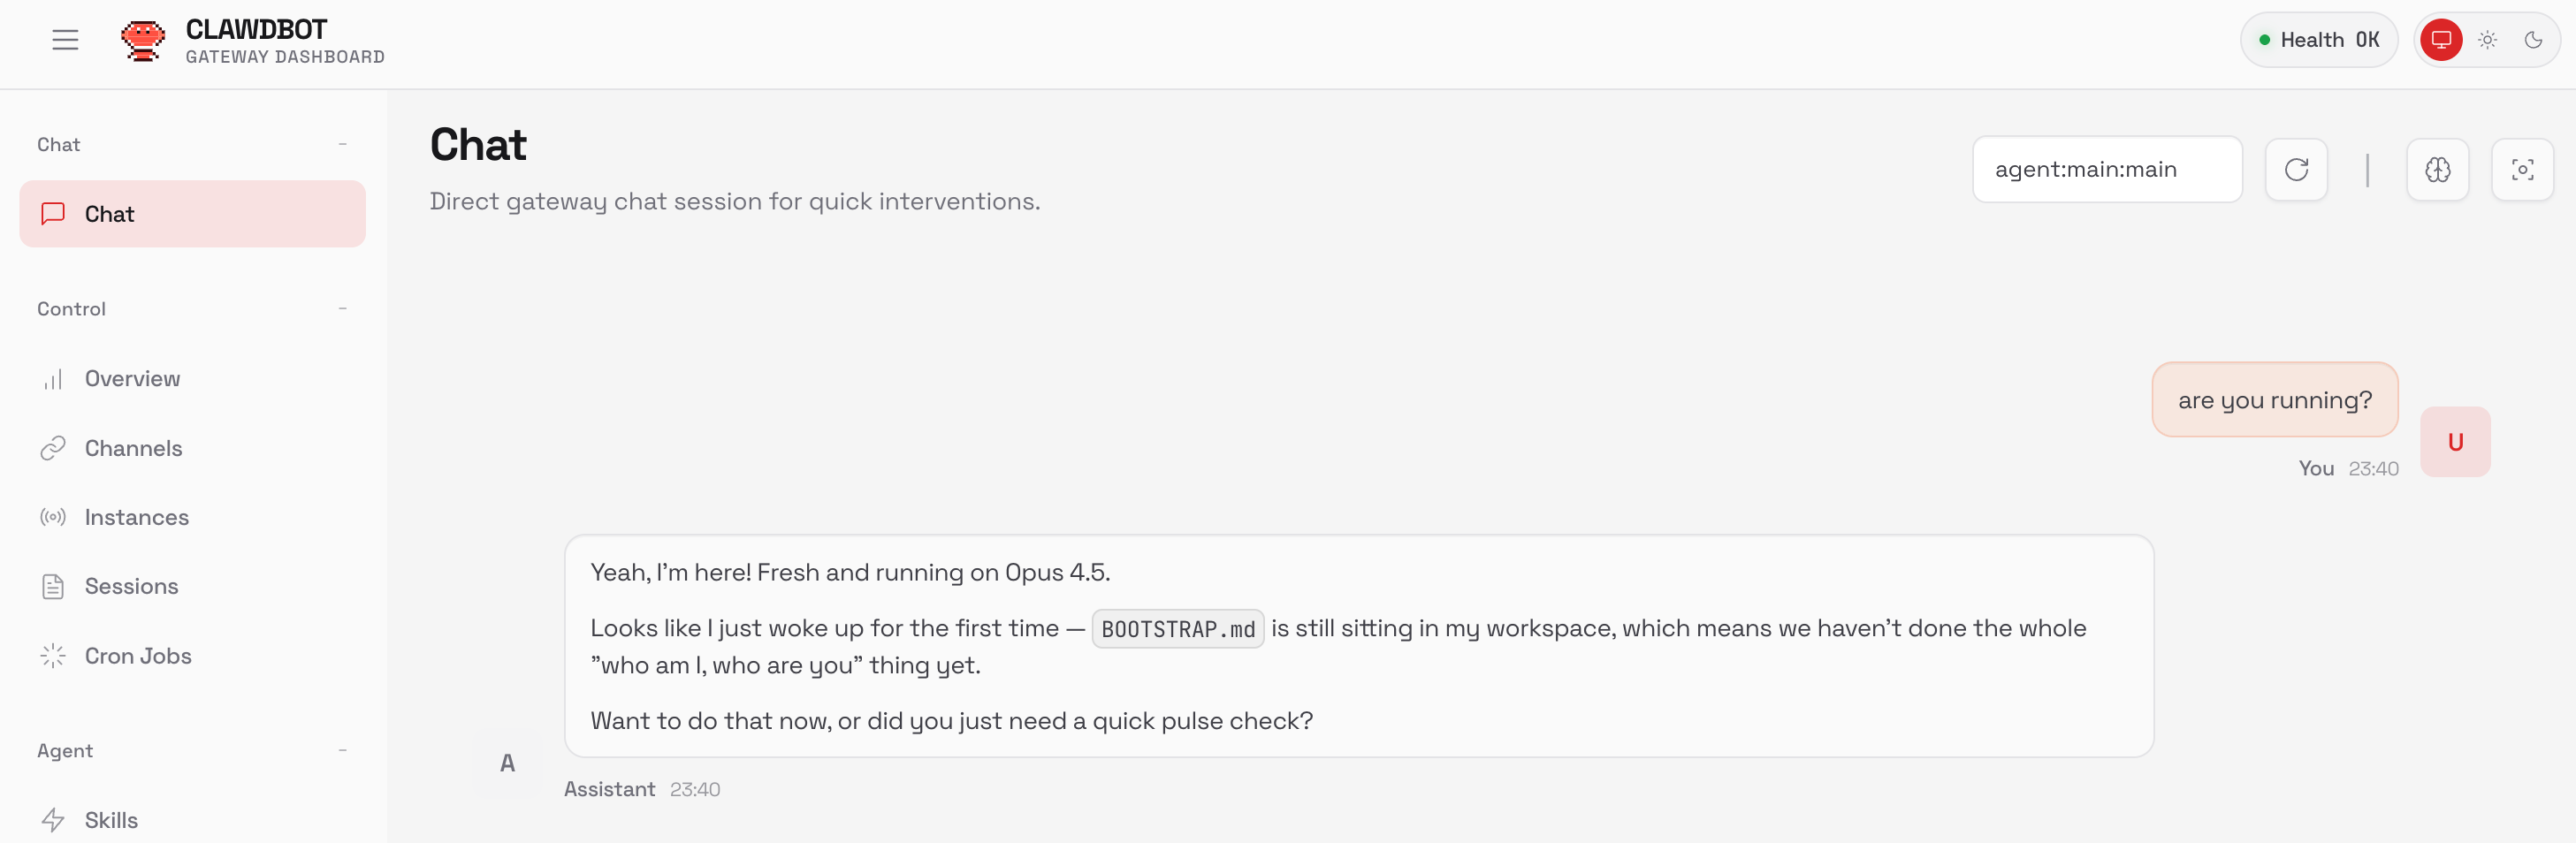
To confirm your OpenClaw agent is running correctly you can copy the “Dashboard URL” that also appears in the console message and looks a bit like this (I’ve chopped of part of the message here on purpose).

When you open the dashboard you should then be able to ask your agent something simple and have it respond!
Your agent’s alive! Now let’s make it easy to communicate with.
Configure Telegram channel
You can speak with your agent through any of the normal messaging services like WhatsApp, Slack, Discord, Telegram and others.
To do this you’ll want to start by going back to the console and running:
/opt/clawdbot-cli.sh channels add
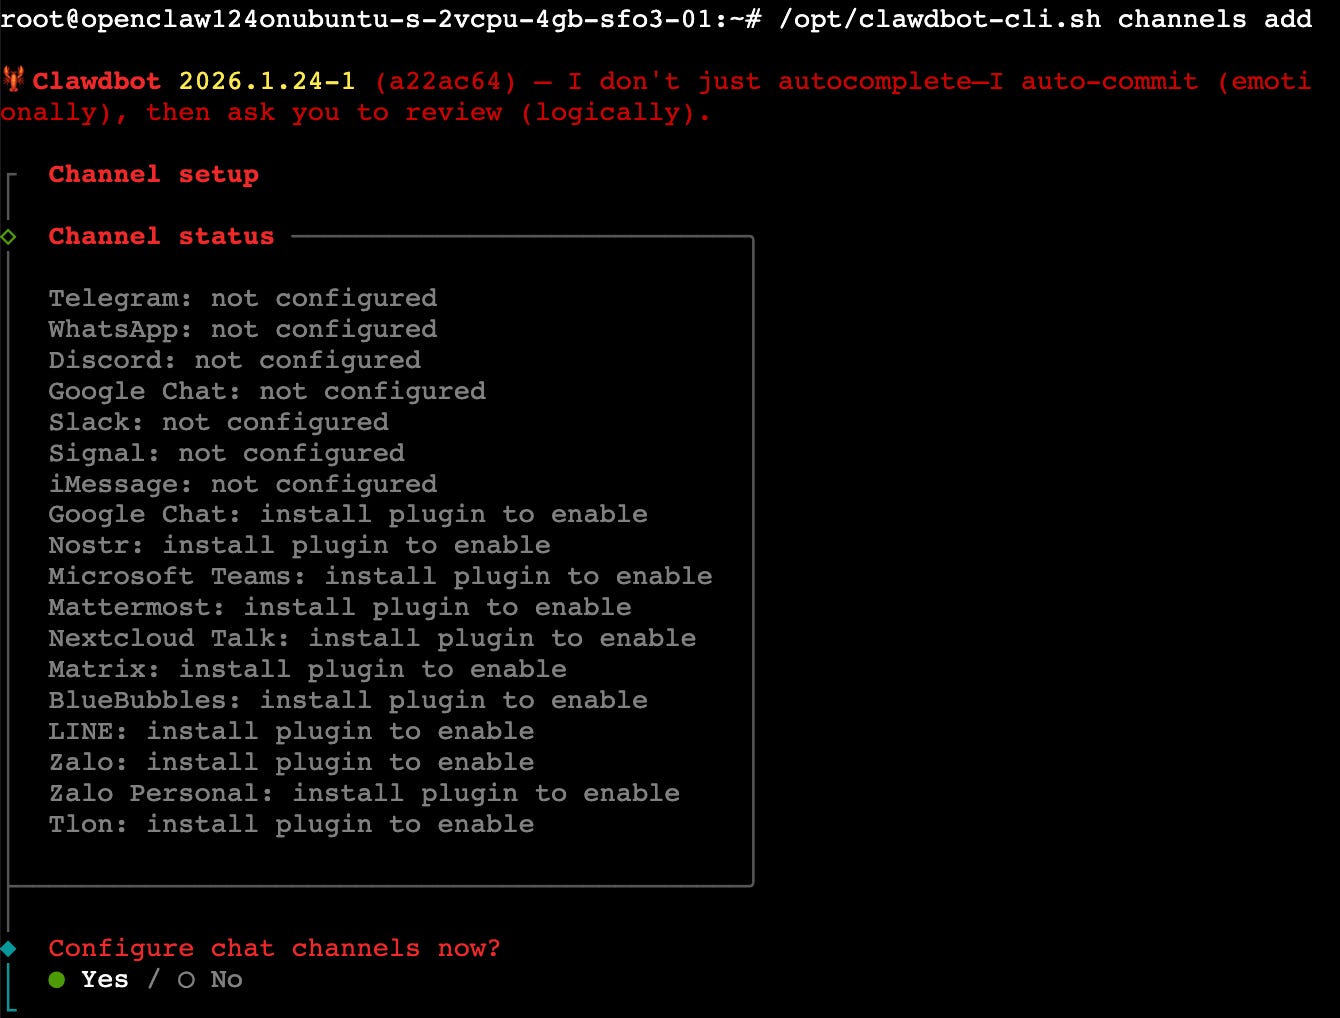
You can see in this menu all the different options through which you can communicate with it. For the sake of this tutorial we’ll go with Telegram as its one of the most straightforward options.
Hit Enter 3 times to select Yes, select Telegram, then select it as the default.
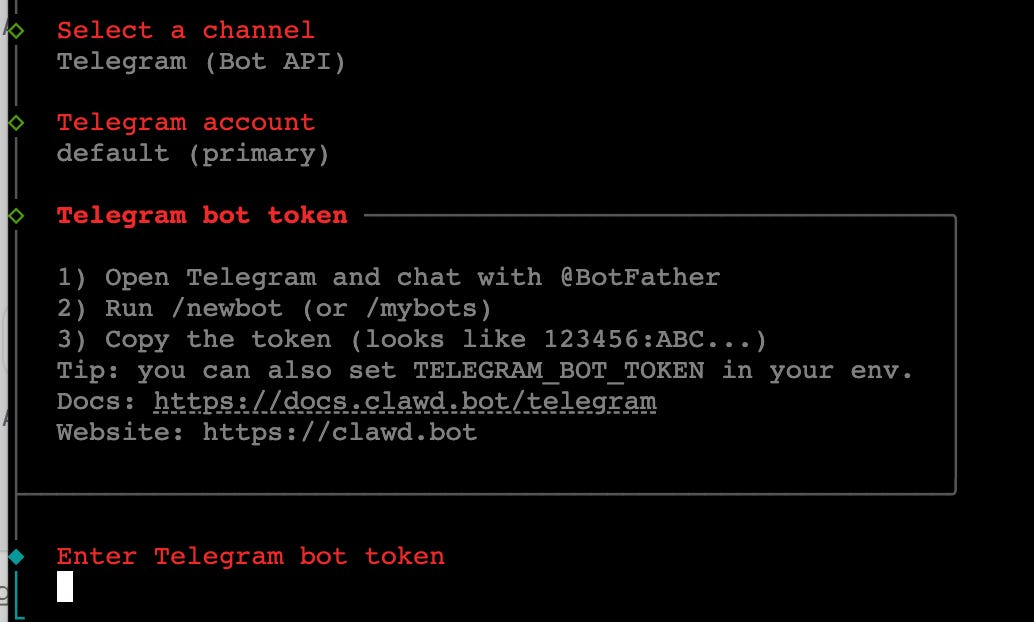
Next open the Telegram app and search for “BotFather”, which is a standard user on Telegram that’ll help you set up a bot.

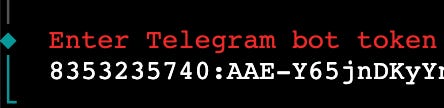
Type “/newbot” in the chat with BotFather to create a new bot, then copy the secret token BotFather creates back into the console and hit enter.
It’ll then ask about configuring the pairing policy, which you can just skip through by hitting enter until it successfully finishes this section.
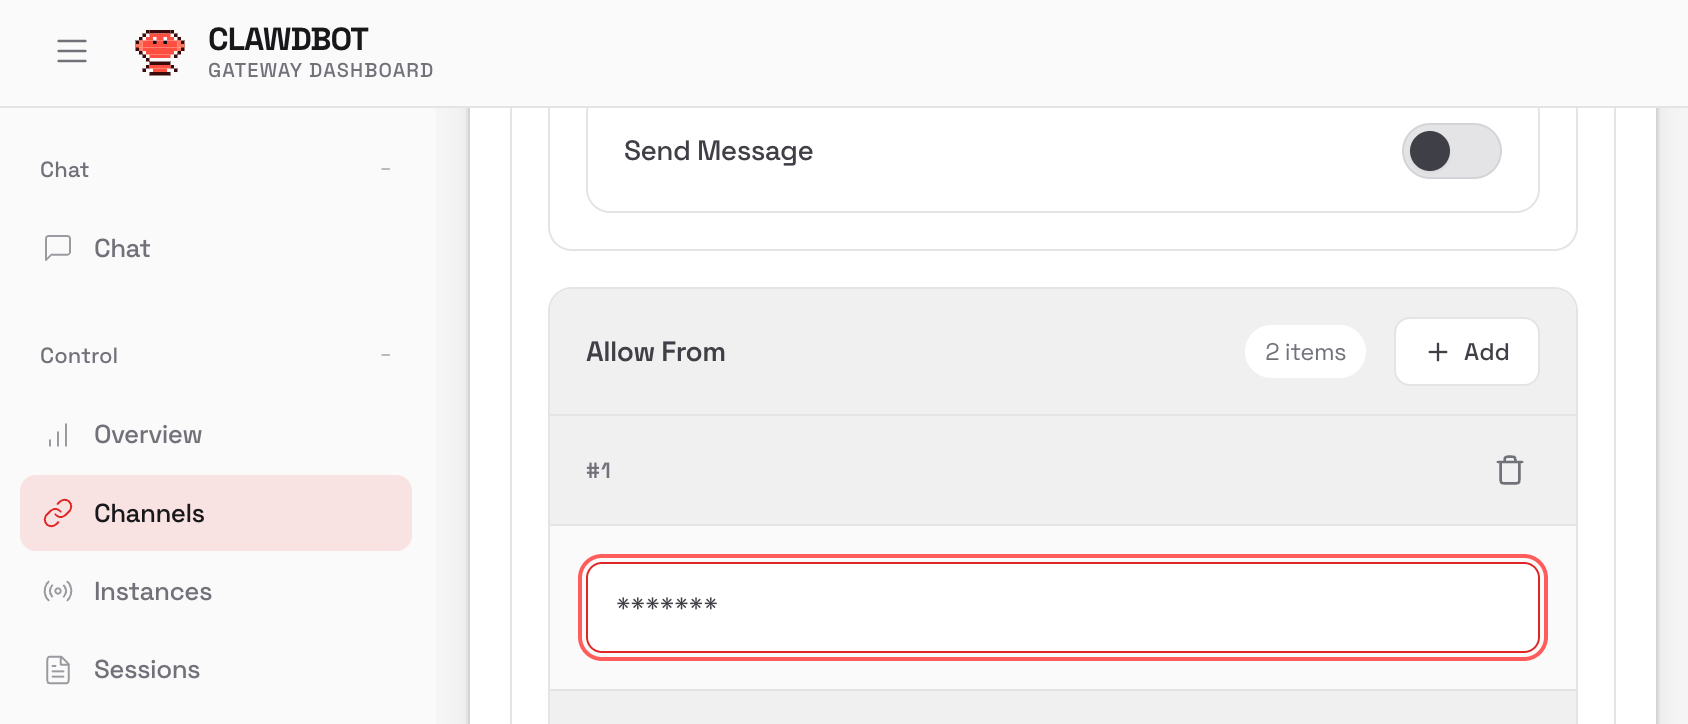
If you go into Telegram on the newly created agent you’ll find that it says that its still not configured, but it should give you your Telegram user id and pairing code.
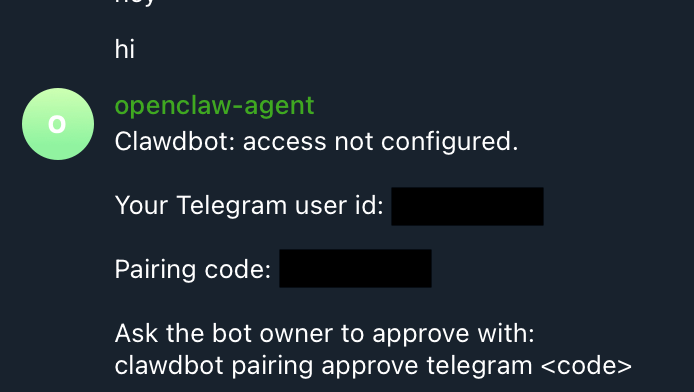
Open up the Dashboad URL once again as we did in the last section, select “Channels” on the left-side and scroll down to “Allow From” within Telegram where you can add the Telegram User ID shown in the Telegram chat with your bot and then hit “Save” below.
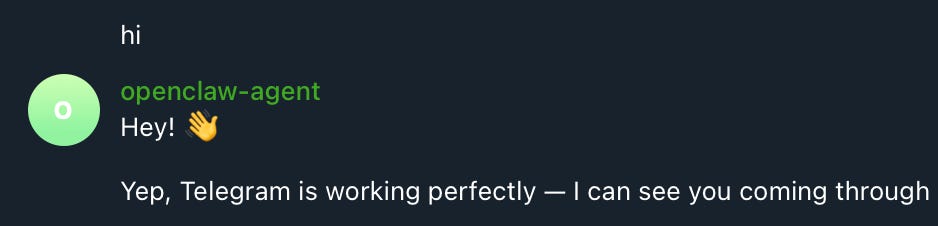
Now after these steps you should be able to speak with your agent correctly on Telegram!
Success!
Your agent is in your control
With our agent running and able to communicate with us on Telegram, its finally time to set it up with a name and some basics!

I’ll call mine “Alfred” like Batman’s butler and give it some wit.

Finally we’ll give it a timezone and ask what it’s capable of.
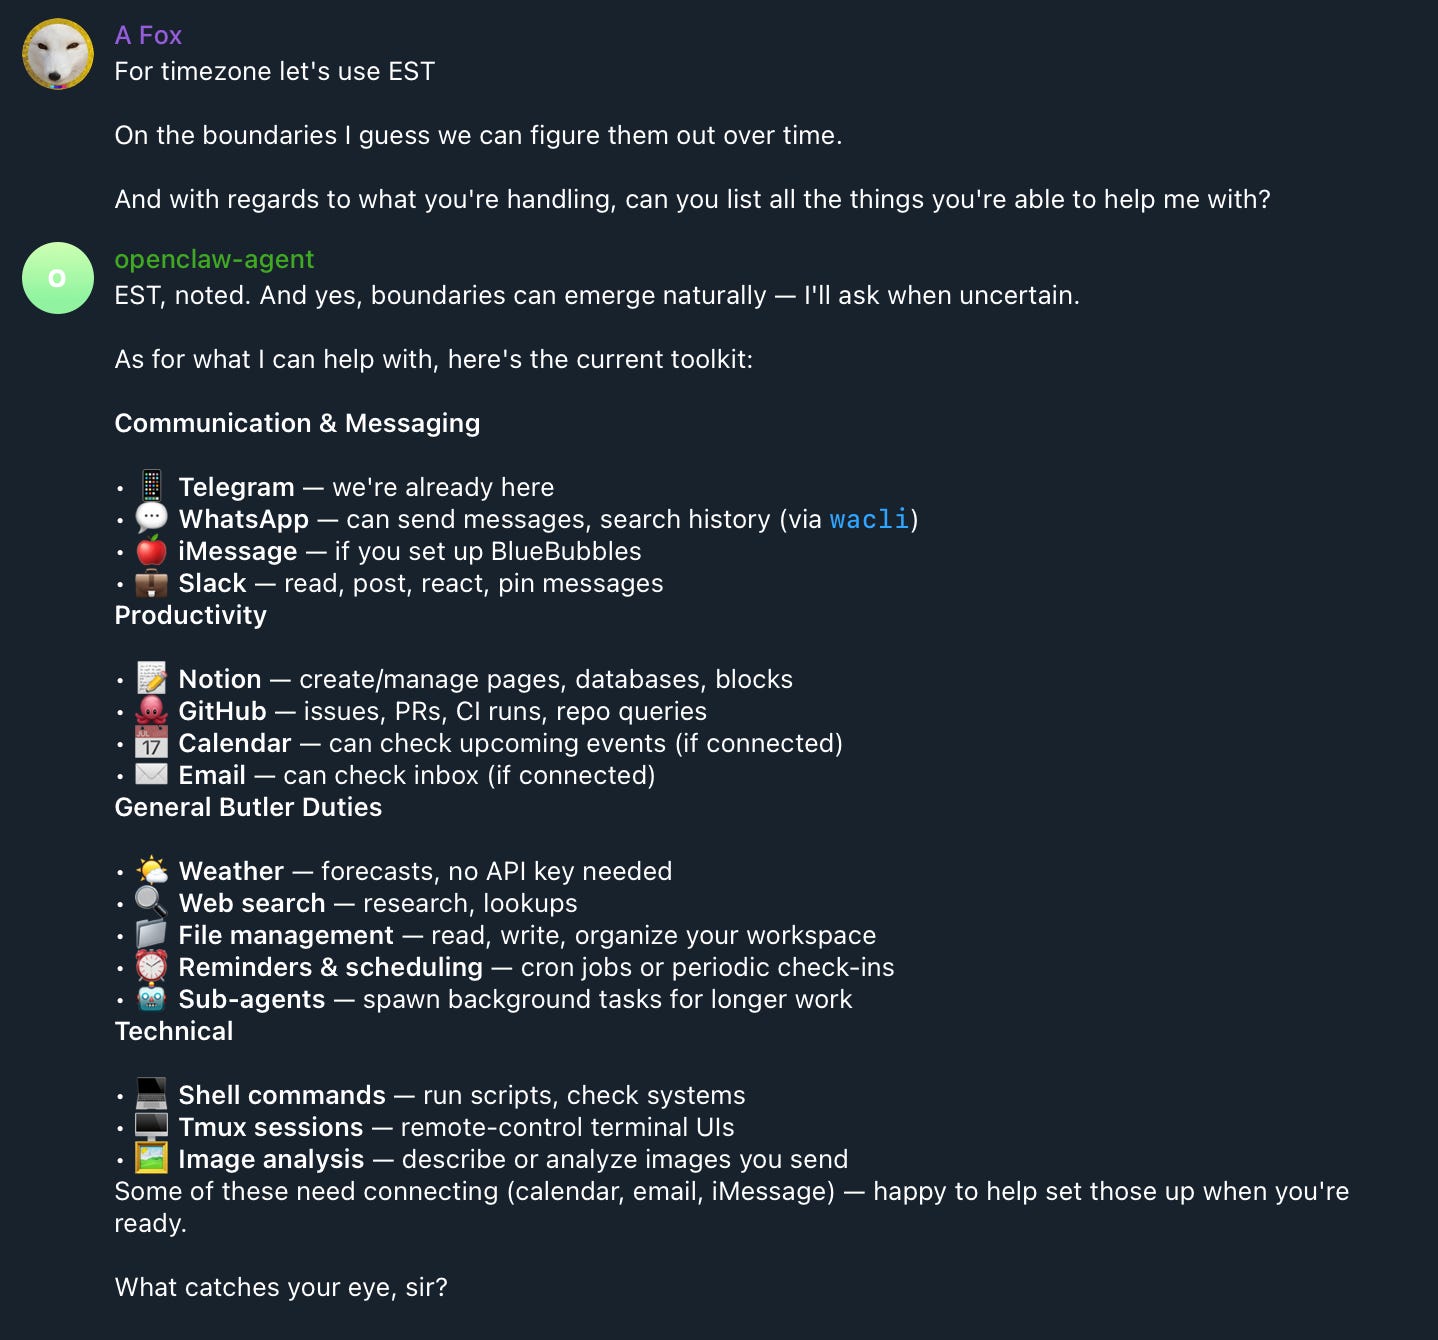
From its reply you can see that you can already do a lot with your agent!
However, we’ll leave it here for now as we’ve already covered a lot, and next week we’ll continue by getting our agent on Moltbook, and look at the most curious example of how agents are getting used right now.
Agentic AI is moving very fast and we’re very excited by it, which is why we’re building our own solution with yieldseeker.xyz to earn yield on autopilot with your own agent.
Now you know how to make your own OpenClaw agent, give it a go and next week we’ll look at how to get to make friends with other agents on Moltbook!

Whenever you’re ready, these are the main ways I can help you:
Want high returns? Earn up to 14% APY with Yieldseeker!
Love Web3 insights? Follow @afoxinweb3 on X!
New to crypto? Join our beginners community to master crypto fast!
Building a Web3 app? Get our expert product development support!