Write your first Smart Contract in 3 minutes
For non-coders to learn how to write and deploy a simple smart contract
TLDR:
Non-coders in Web3 will have a better understanding of the technology if they have written and deployed a smart contract onto the blockchain themselves.
I’ll show you that in 3 minutes you can write, compile and deploy a contract on-chain. This contract will simply print “Hello world” following the common convention when learning a new coding language or framework.
You’ll learn to use the Remix IDE, create a new solidity file with some code, compile and deploy it, and interact with the contract on-chain to see the results.
For non-coders a smart contract may sound like a very foreign and complex concept. However, if you’ve followed my blog you already know: (a) how to read solidity code and interpret a minting contract; (b) how to navigate a contract on etherscan; and (c) you’ve even looked at the CryptoPunks contracts.
So today I want to do a super short tutorial on how to write and deploy your own smart contract!
The contract will be simple and won’t be able to do much but just the act of having written and deployed your own contract will certainly give you more insight into the nuts and bolts behind Web3 technology.
Hello World
When learning a new language or framework there’s a convention in the coding world that the first basic program you write is one that prints the words “Hello World”.
There is no deeper meaning behind this other than just showing that you know how to successfully write and deploy some code for that environment.
So in the next 3 minutes you’ll learn to create a smart contract in Solidity with a variable set to the words “Hello World!”. Perhaps in a future tutorial we can expand on these concepts further but my goal is not to teach people how to code (there are better resources online for that) the goal is just to demystify and simplify Web3 concepts.
Remix IDE
First you need to be able to write the code somewhere. An IDE is an “Interactive Development Environment” and provides you with the tools to write, test and deploy the code in an integrated and easy to use way.
In Solidity one of the simplest and also most commonly used IDEs is Remix. The beauty of Remix is that there’s a version that’s fully online in your browser so you don’t even need to download anything!
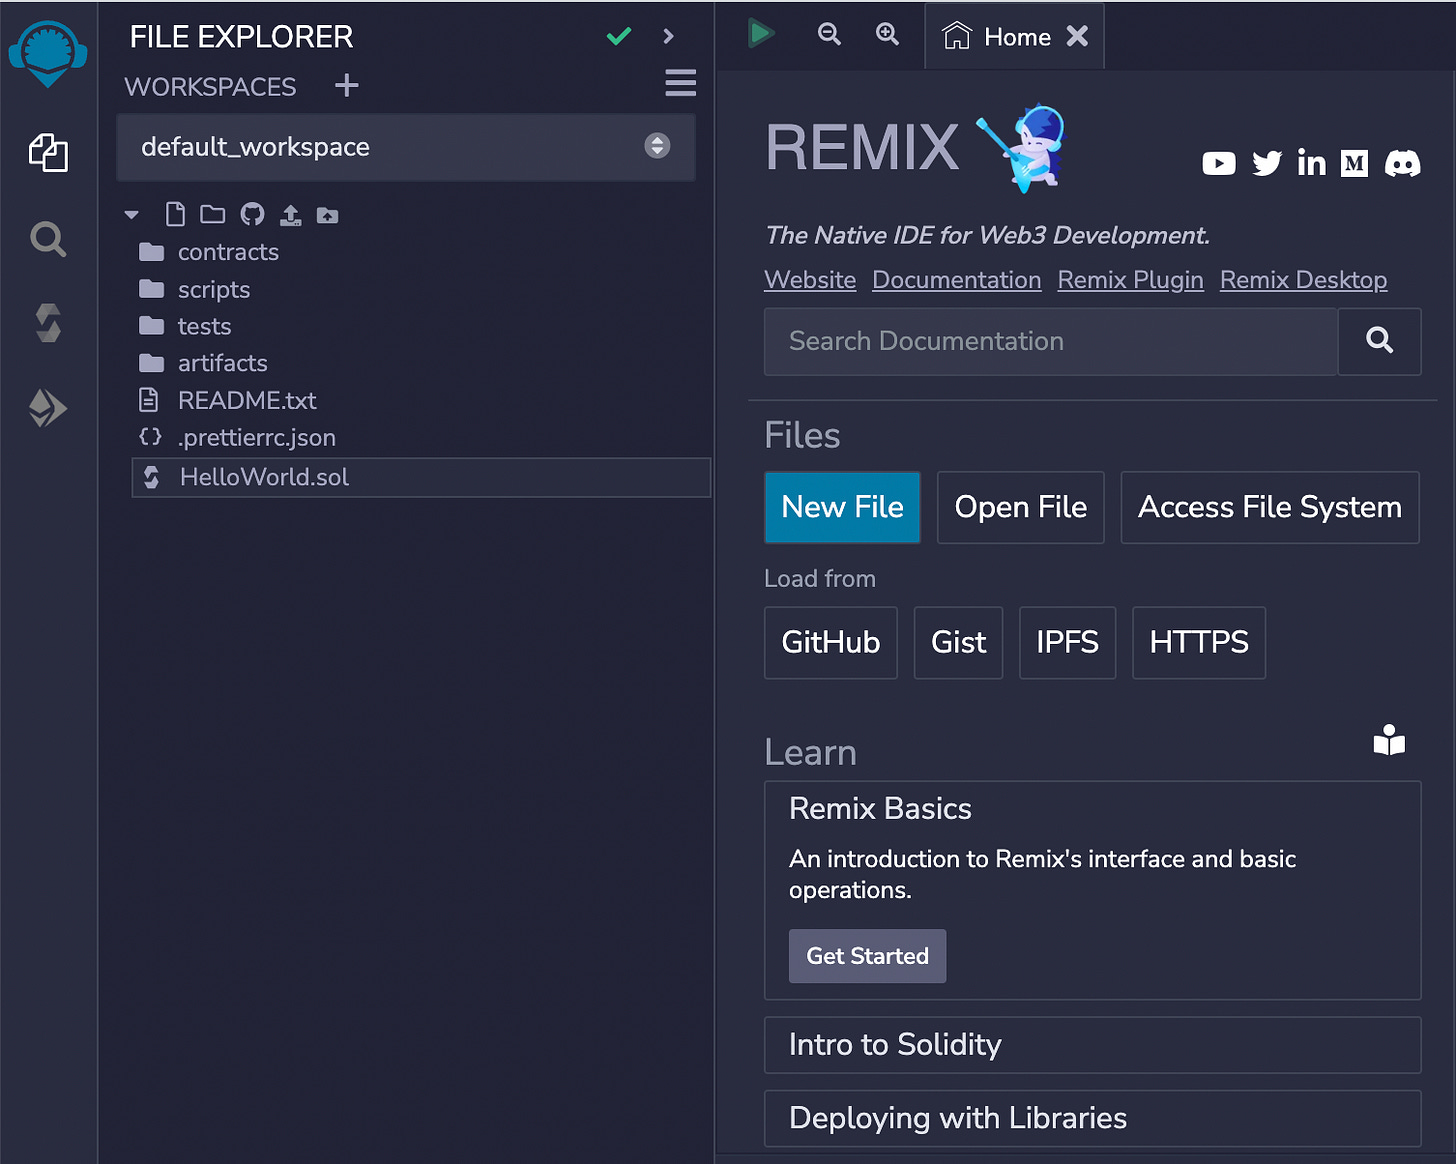
Start by opening the Remix IDE at https://remix.ethereum.org/ and then create a new Solidity file with blue button “New File” and renaming the file to “HelloWorld.sol”.
Code
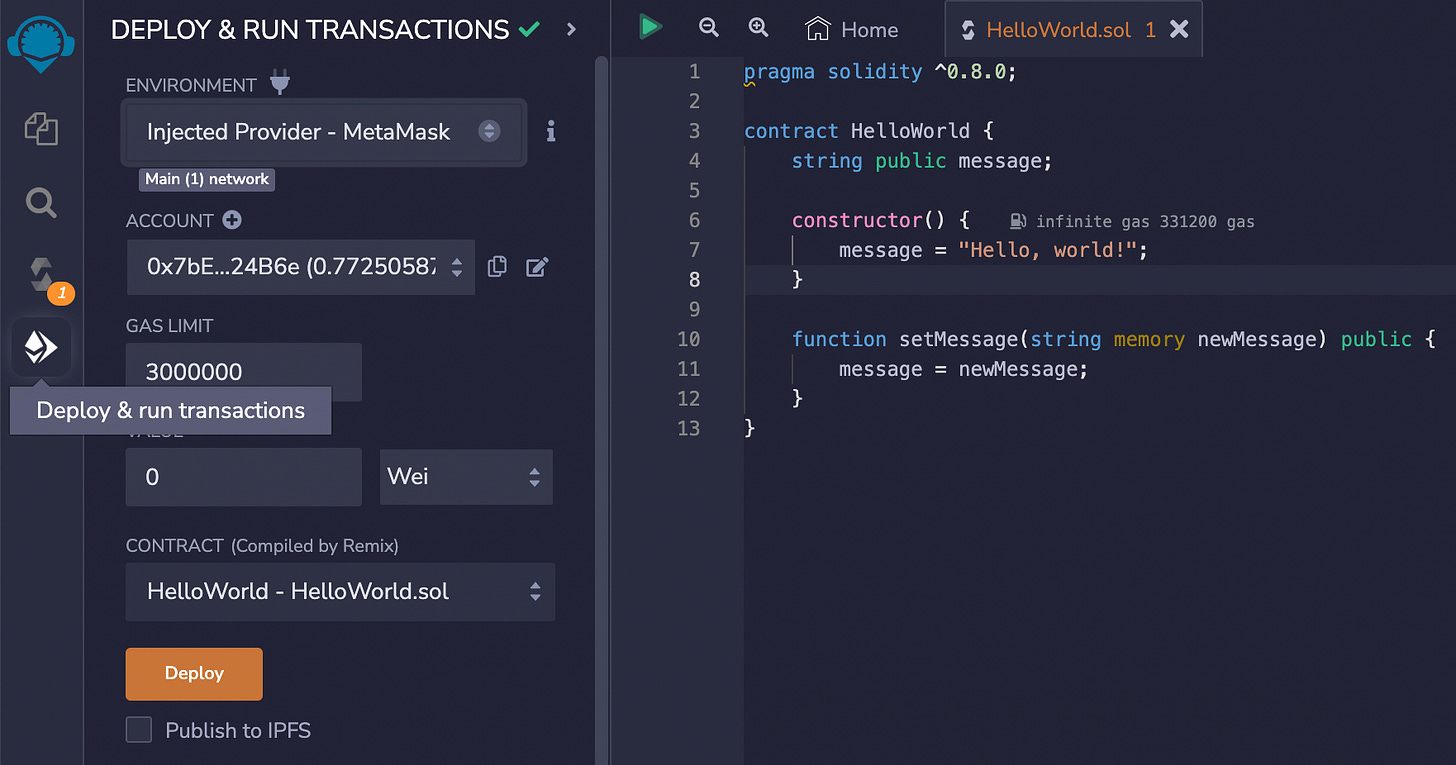
We want to keep it simple and fast so I’ve already written the code for you. All you need to do is copy and paste the code below in the “HelloWorld.sol” file.
pragma solidity ^0.8.0;

contract HelloWorld {
    string public message;

    constructor() {
        message = "Hello, world!";
    }

    function setMessage(string memory newMessage) public {
        message = newMessage;
    }
}
This code creates a new contract with the name “HelloWorld”.
Such that the contract has a variable called message that’s a string (ie. its a text variable) and since its public anyone can read and access it.
The constructor is called when the contract gets deployed onto the blockchain, and in this case it saves into the message variable the text "Hello, world!"
Finally, there’s a setMessage() function that allows anyone to set the message variable to something new so it can be updated from “Hello World”.
Compile & Deploy
Compiling means taking the Solidity code and turning it into code the machine will be able to read and interpret, in this case to EVM bytecode. Meanwhile deploying means making the code runnable, in this case uploading it to the blockchain.
To compile the contract select the Solidity Compiler tab on the left side of the screen. Under Compiler Configuration, select version 0.8.0 of the Solidity compiler. Then select the Compile HelloWorld.sol button or just hit CTRL+S to save, which compiles for you. This generates the EVM code under the hood.
To deploy the contract select the Deploy & Run Transactions tab on the left side of the screen. Under Environment, select Injected Web3 to connect Remix to your local browser wallet like Metamask. Then, click the Deploy button to deploy the contract to the network.
You’ll need to confirm and accept the transaction and once the contract is deployed a green tick will appear - and that’s it!
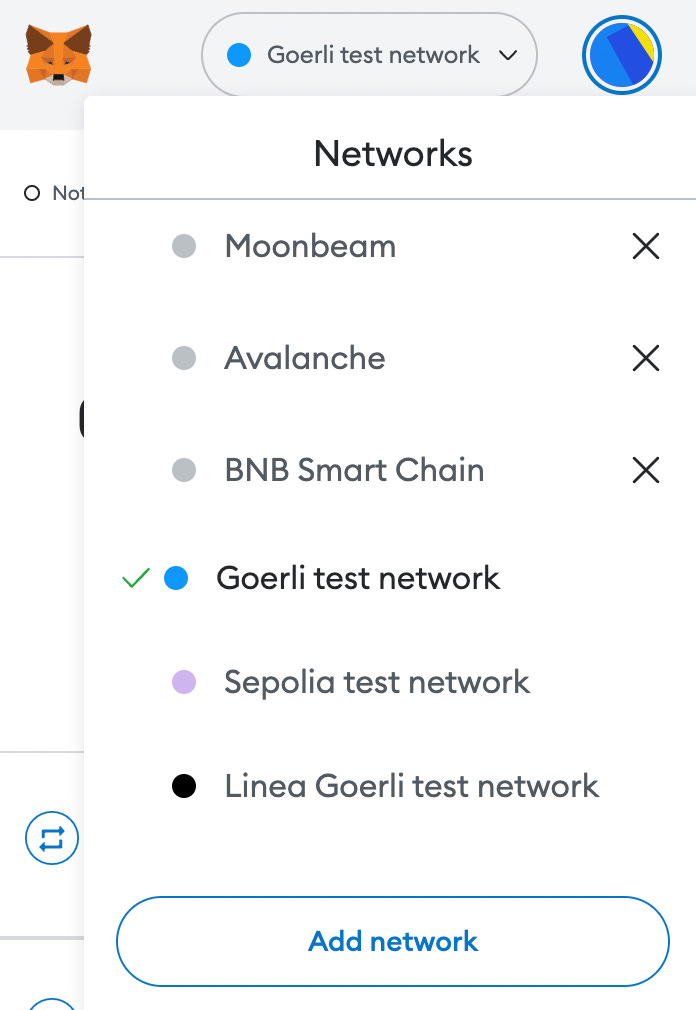
If you don’t want to spend real ETH then you can deploy to the Goerli testnet by setting the network in your wallet to “Goerli”, and you can get some free Goerli ETH from a faucet like Alchemy’s: https://goerlifaucet.com/.
And if you are reading this and don’t have a browser wallet like Metamask you can simulate the blockchain locally by selecting one of the VM options in Environment like Remix VM (Shanghai). But do note that the magic lies in seeing your code deployed on a real blockchain.
Success!
Congrats you’ve written your first basic Smart Contract and deployed it onto Ethereum or a test chain! How long did that take you, no more than 3 minutes I imagine? Give yourself a pat on the back!
You can now interact with the contract by just clicking Deployed Contracts on the left-hand side where you can select the message button to print “Hello World!”.
Plus you can select the setMessage() button and enter a new message value in the input field. Then, click the transact button to update the value of message!
This contract is live on the network so you can interact with it with Remix IDE or any other method where you can access what’s stored on-chain like Etherscan itself.
Learn More
Did that taste of Solidity give you an urge to learn more?
If so here are a few resources where you can move onto more exciting challenges and learn more about Solidity smart contract development:
Cryptozombies - Interactive tutorial that teaches you to write Solidity with a simple zombie game
Cryptokitties tutorial - Cryptokitties created the ERC721 standard used for NFTs, and they created a tutorial for making a simple dApp.
YouTube Channels - Dapp University and Eat the Blocks are a couple of good Youtube channels that give plenty of help.
Open Zeppelin - is the single best library of reusable smart-contracts, all Solidity devs refer to this, plus they have basic tutorials on their site too.
Hope you learned something new today or at the very least had some fun.
Keep buildin’ builders.


