Using PREMINT for Allowlists
"During a gold rush, sell picks and shovels!"
TLDR:
Premint is used to create allowlists for NFT mints. Allowlists are a really important tool on measuring demand for a mint.
It was used by 100s of projects during the NFT mania, and at 1 ETH per project it made an absolute killing by “selling picks and shovels during the gold rush”.
The short tutorial below shows that its a simple yet powerful tool.
I’d not recommend using it because of its pricing. Instead I’d recommend HeyMint, which offers almost entirely the same features for free.
Over the last few weeks I’ve looked more at the fungible side of Web3. Today I’m going back to the non-fungible side by looking at PREMINT!
Their official name is in capital letters but I’ll use normal casing (ie. Premint) for easy reading.
Premint appeared during the height of the NFT bull-run in 2021, making it super easy to create allowlists (also known as whitelists) for NFT projects that were minting. I’ll cover how premint works and how this was a smart strategy on their part!
PREMINT
During the height of the previous crypto bull-run in 2021-22, there were lots of new NFT projects minting every single week. To both gauge and generate demand it was common for projects to create allowlists (or whitelists) for their mint.
Often projects would make people do specific tasks to get on an allowlist and give incentives like a reduced price for minting on the allowlist versus minting on public.
At first this was done in a very manual way, but soon enough Premint appeared on the scene and made it super easy for projects to generate allowlists. Premint helped projects validate they had the demand for a mint and control the exact conditions for participating, reducing the chance for bots to ruin it.
Measuring interest is an incredibly important thing for an NFT project as it ensures there’ll be enough demand for the supply of NFTs you’re selling. I even covered the importance of this in one of my first posts this year!
Now in the height of the bull-run everyone wanted to use Premint, so they were able to charge a pretty ridiculous price of 1 ETH per user - which was as high as $4800 at the height of the market and today its still over $1600.
Essentialy though, Premint is just glorified form, you could use Google Forms for free and have a not-so dissimilar experience!
Premint’s success is an example of the classic mantra “in a gold rush, sell picks and shovels”. As people were building projects left right and centre to sell NFTs, Premint made 1 ETH off every single project who used them. While I have no concrete numbers, I would hazard a guess that at least 300 projects used them, which is easily a over a million dollars made from a pretty simple piece of software.
Today it looks like Premint hasn’t changed for a months, in fact even their pricing is still 1 ETH, which is totally out of whack with currents expectations in the bear market. The best competitor I’ve come across today is HeyMint who do allowlists entirely for free and I’ll likely cover them in the future.
Even though Premint’s pricing is entirely off for today’s market, I still think Premint is a great tool and played an important role during the rise of NFTs and its worth understanding how it works. So next I’ll show you how to use Premint.
Connect and Confirm Email
To start open Premint then sign up or log in by simply connecting your Web3 wallet.
As soon as you create a new project with the “+ New Project” button, assuming this is your first time, you’ll need to provide an email address and validate that you own it to carry on.
Create new PREMINT allowlist
Having logged in and connected a valid email addres, you can now select the “+ New Project” button again and you’ll start the process of creating an allowlist.
You’ll be asked to pick a: project name, website, image, mint price and date. Where only the first three fields here are required. Importantly any optional field that you don’t set you can update later in the project view.
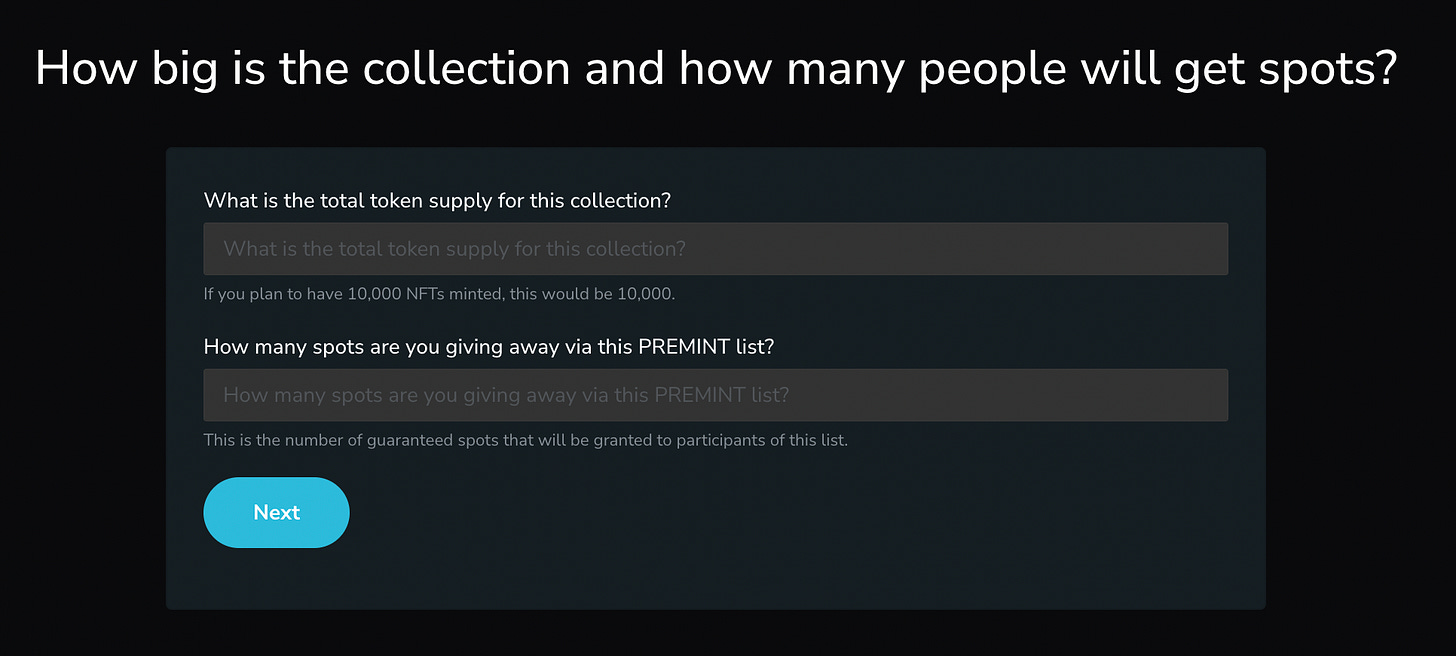
Next you’re asked about the total supply for the NFT collection and how many will be available for those on the allowlist, although neither field is compuslory.
Yet, if you genuinely want to set up a Premint allowlist then I highly recommend setting both of these as they help to generate a sense of scarcity.
Finally there’s a flag to define whether you are over allocating or not. Overallocation can help guarantee more sales on mint day, but it can also put off potential minters who may see it as unethical.
Set Dates
Next, Premint asks when you plan on starting registration and closing it.
The only compulsory field here is the start date. Yet once again, the other fields are helpful in generating urgency as an end date for example can make people feel more compelled to sign up now and not risk missing out later.
Also you can let people on the allowlist know the date that winners will be selected if there’s a raffle for a limited number of spots. Again this is not compulsory though.
Confirmation & Project View
Finally you’ll be asked to confirm the Premint allowlist settings you’ve set so far.
In this example project I left most optional fields blank, so there’s a lot of TBDs and not defined shown above. Importantly, Premint gives you a lot of freedom to be as open ended or restrictive as you want with your allowlist.
Having confirmed the project you can now see more details about it in the project view and fill in anything that you may have left blank during creation.
Giving more details on dates and supply helps to generate urgency in terms of time and scarcity, so setting these fields is highly recommended.
Requirements
Selecting “Requirements” under “Setup” on the left-side of the project page brings up the option to set specific requirements for people to join the allowlist.
The main options you can set are:
Minimum Wallet balance - set a threshold of ETH the wallet must have
Token Ownership - token gating based on an NFT or a POAP
Discord requirements - having a specific role in a Discord server
Twitter requirements - connecting your twitter and following specific users
Custom field - your choice, can be used to capture emails for example
Only accessible via collabs - limits allowlist spots to collab partners
Password - so only people with the password can view and register
Bots are historically often a problem on a hyped up NFT mint. To prevent bots Premint recomends setting the minimum wallet balance above 0.25 ETH, token gating the registration with another NFT, and requiring a specific Discord role.
Plus each requirement has a rating of how good it is for bot prevention, eg.
Register for Allowlist
By clicking on “See your PREMINT Page” you can preview how the page will look for others registering for the allowlist. Plus you can test registering out for yourself.
In the above case I set a minimum wallet balance and an email custom field. If try to register but don’t meet the criteria, such as not having enough ETH, it will fail and explain which requirement criteria it failed on.
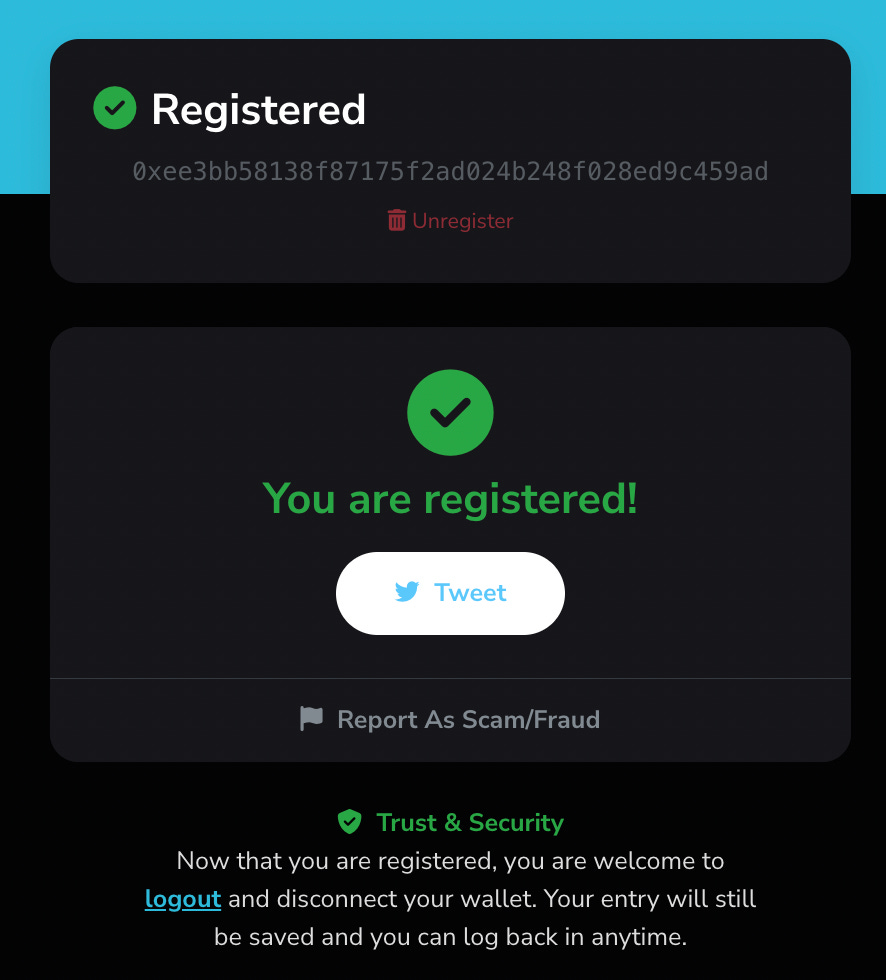
If you do meet the criteria then you’ll get a success screen on registering.
And the corresponding entry appears back in the “entry list” field on the dashboard.
However, as the message in the blue banner shows, you can only activate the registration page if you have a Premint creator pass.
Creator Pass
This is where Premint clearly shows that it was a tool intended for the bull-run and hasn’t been updated to the current market.
To activate the allowlist you need to mint a Creator Pass that’s essentially a soulbound NFT. Yet, the price is 1 ETH (today that’s over $1600), which is incredibly high for a service like this in today’s market.
What’s most incredible is that during the mania of the NFT bull lots of projects paid 1 ETH, and ETH was worth even more then, as much as $4,800 at its peak! When you consider that many NFT projects minted 100s of thousands and even millions of dollars worth of ETH, the 1 ETH cost was seen as worth it.
Although it has an astronomical pricing, it does have a very complete feature-set, with raffles, collabs, removal of bots, and a host of other features as shown below.
Best alternatives!
Today I’d 100% recommend to use the entirely free alternative by HeyMint, rather than Premint. HeyMint doesn’t have the same brand awareness as Premint but its feature set is very similar, and once again, its entirely free!
Below is an example of a registration page, which looks a lot like Premint’s. As I mentioned before, I will likely cover HeyMint in a future post.
Other alternatives include simply using any sort of form software out there like:
While form software is not as specialised as HeyMint or Premint, its a lot more widely recognised and understood by non-Web3 natives, everyone’s seen a Google Form:
However, if you want to do something more robust you can make your own lading page with an inexpensive landing page builder like:
There’s literally 10s if not 100s of different options for both forms and landing pages that will set you back a lot less than Premint.
Allowlists are Important
Whether you use Premint, HeyMint or any other alternatives, allowlists are important!
Allowlists give you the ability to gauge interest and build up demand to validate the supply you’re selling and whether you have enough to even release the project!
If for example you have 1000 people on an allowlist, then you know that a supply of 500 NFTs will probably sell out, yet there’s no guarantee that 10,000 NFTs will sell out!
I’ve worked on projects that minted out and others that didn’t, and the clearest difference between them was on controlling the levers of scarcity and demand. So make sure to measure interest and get real metrics on demand, remembering that the formula for a successful mint is simply: Demand > Supply.
With the current pricing I wouldn’t recommend using Premint, but at least now you know how to use it and understand the importance it played during the height of the NFT mania.


