Launch an NFT collection in 10 minutes
Use today's free no-code solutions to launch your own NFT collection faster than ever.
TLDR:
There are many no-code solutions nowadays to launch an NFT collection, in this guide we’ll be using Curious Addy’s “Hey Mint Launchpad”.
I’ll run through each step: (1) Getting started; (2) Generating the art and metadata; (3) Configuring sales details; (4) Deploying; (5) Minting.
I suggest running through this guide once quickly, to see how fast you can get something on-chain, then coming back a second time to finesse the finer details.
A couple of weeks ago I released a guide on how to write your first smart contract in 3 minutes which was well received. With that in mind I decided to write more “how-to” guides aimed to teach non-technical people in Web3 something powerful in a short amount of time.
So this week I decided to show you how easy it is to launch your own NFT collection with the no-code solutions out there in the market today.
There are a numerous solutions for this like the NFT Inator, CRAFTD, WenMint, Bueno, NiftyKit and even Manifold. All of these are great but for today’s tutorial I chose to go with HeyMint. Using HeyMint you’ll learn how to launch your own NFT collection in literally no longer than 10 minutes!
Hey Mint Launchpad
Hey Mint Launchpad is a platform created by Curious Addys, who are a Web3 community and company that have created several tools in the space beyond the launchpad - tools for allowlists, for education and even to mint your first NFT.
Curious Addy’s have close ties and the support of Zeneca and his Zen Academy, who is very conscious of only being associated with the best in the space.
Most importantly the Hey Mint Launchpad is one of the most robust and easiest tools to use out there for NFT generation - and its entirely free to use! As you test it out I believe it’ll become obvious why I’m recommending it.
Getting Started
First, open the launchpad here and get started by connecting with your Google account and then connecting with a Web3 wallet like Metamask. The tagline says you can launch an NFT collection in 15 minutes but I believe we’ll do it in just 10!
Next, select the option to “Create a new collection” down at the bottom of the page.
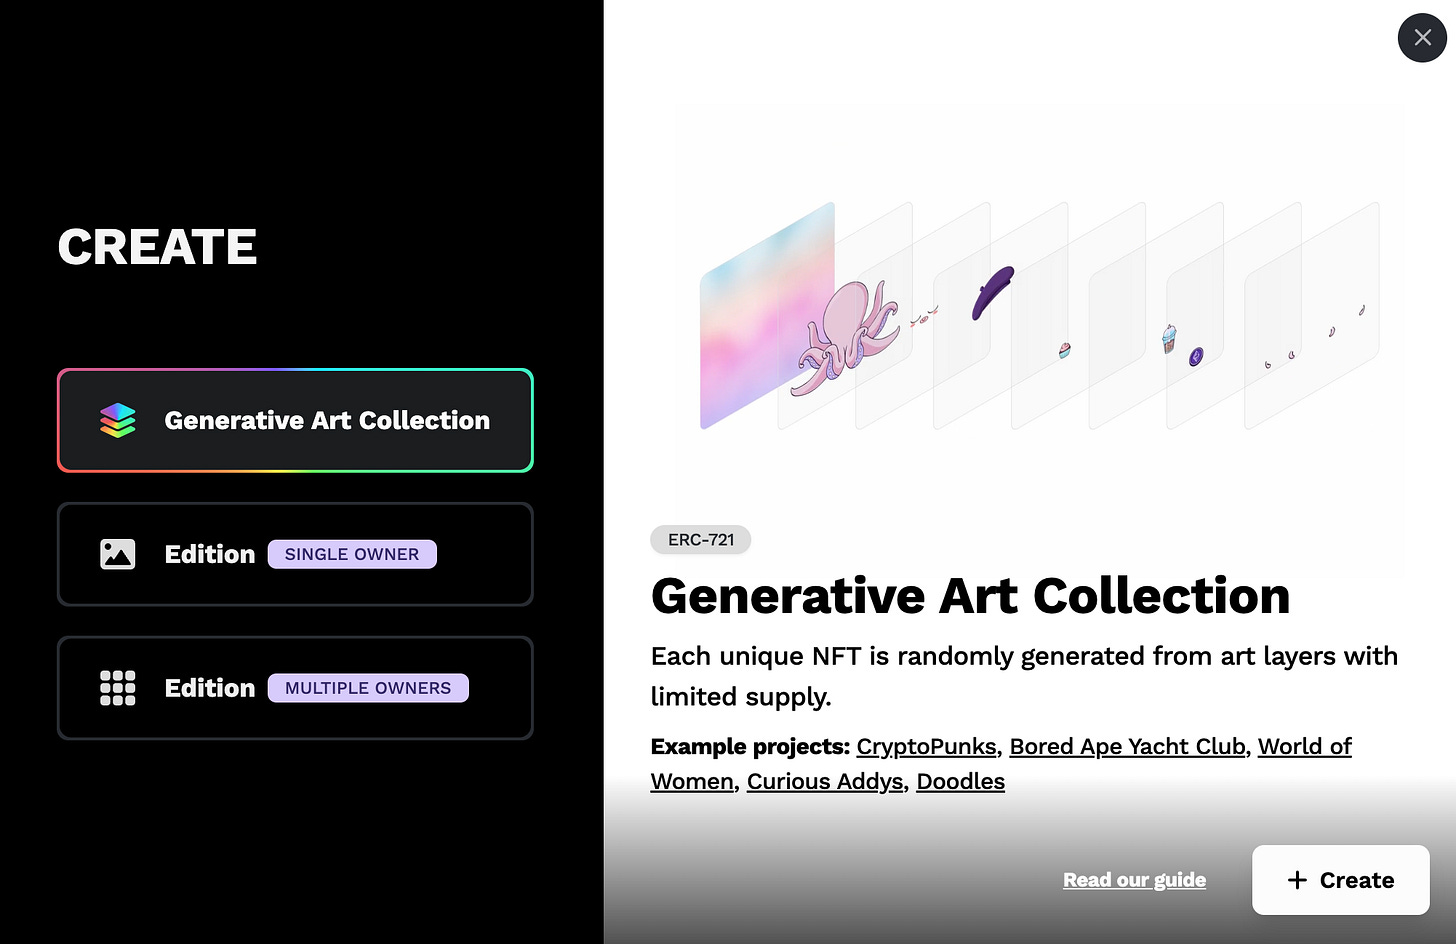
Pick “Generative Art Collection” and hit “create”.
You’ll then be asked to fill in the collection details like name, symbol, total supply and description. You can copy the values I’ve written below as I will be giving you the necessary image layers to make this “Mutant Potato” collection.
Art & Metadata
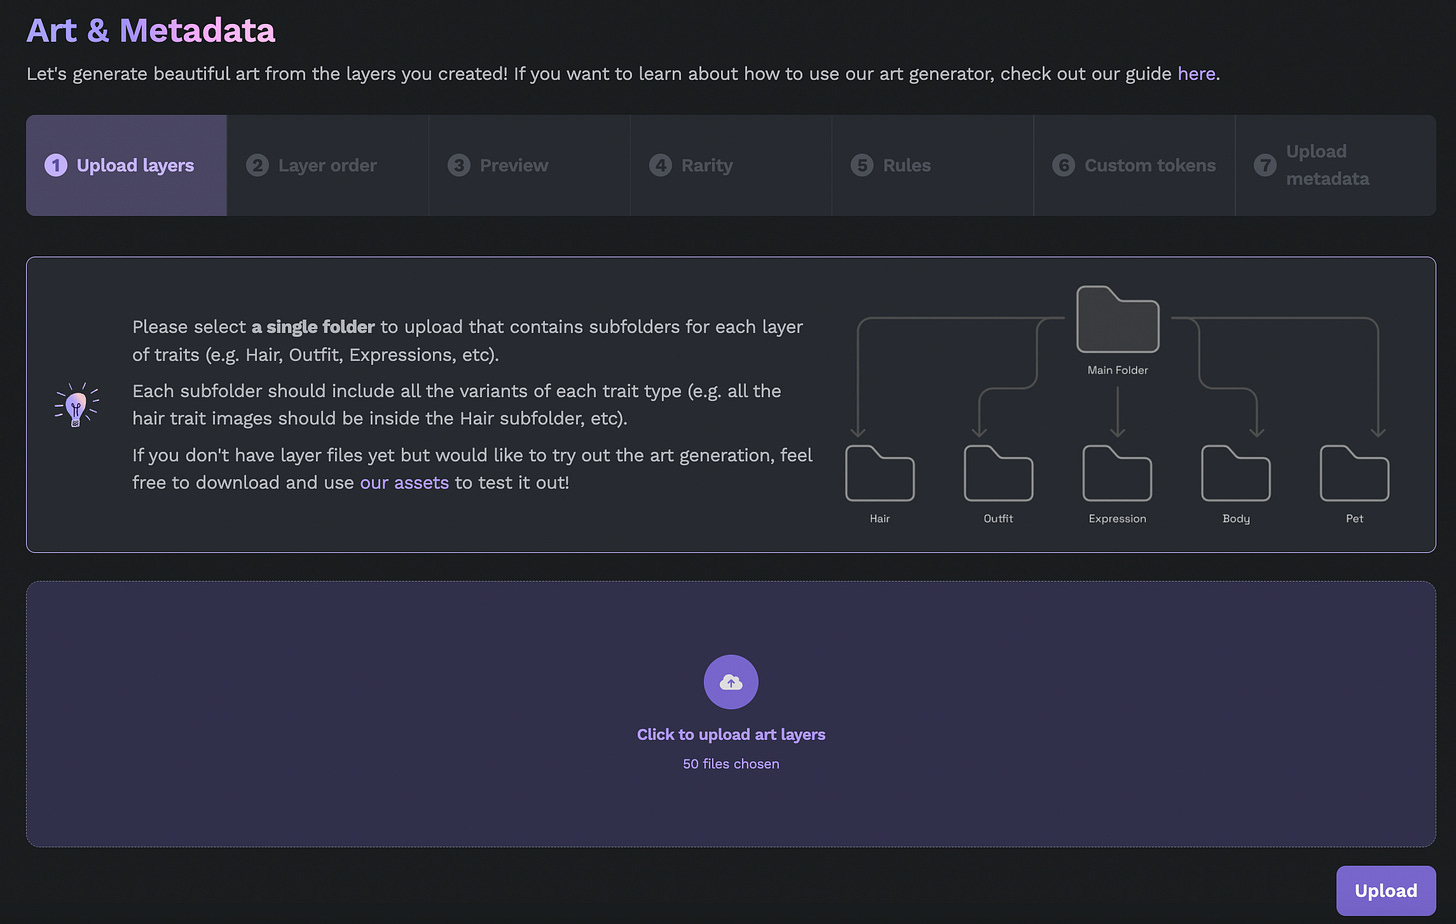
Next you’ll be asked to add image layers. If you want to do it from scratch then you’ll need support from an artist to make each layer. However, for this tutorial I’ve already grabbed some “potato” image layers from CRFTD that you can make use of:
Download the image layers here!
Unzip the folder with the traits and upload them into the Hey Mint launchpad as in the picture below. Note that If you want to skip the entire art and metadata generation process you can also just upload a finished collection.
Hit “Generate Collection” button and you’ll be able to preview the output - these images will be in the same order as the NFTs that will get minted.
At this point you can play with the rarity of traits, create combinatory rules for traits, and even create custom 1/1 NFTs. Once you’re done make sure to save and regenerate the collection to keep the changes.
When you’re happy with the images you can upload the metadata and get ready to launch the collection!
Sale Details
Next you’ll be asked to set up the Sales Details for the collection as it goes to be minted. For example here I’ve set a 69 token supply and its a free mint with no presale or allowlist, although you can easily add an allowlist with Hey Mint’s inbuilt tools.
Importantly you must also set an address for any primary sales and royalty revenue that you may receive. Primary sale revenue can even be split over several addresses.
Deploy
Now you’re ready to deploy! So select “Go to Deployment”.
Next select the network you want to deploy to. I recommend deploying first to a testnet like Ethereum’s Goerli or Polygon’s Mumbai to see how it all works before spending real money on a mainnet.
You’ll need to sign a couple of transactions and once the’ve been validated you’ll have successfully deployed the collection!
If you want to change any contract or sales settings then you can press the redeploy button and edit appropriately.
Minting
Finally to mint you can create your own “Minting Page” by filling in the details.
Then go to the Sale tab and select “Start the sale” to kick things off.
Congrats! Your mint is now open and ready to go!
Here’s an example: https://launchpad.heymint.xyz/mint/mutant-potatoes-goerli
Note that if you don’t want to use Hey Mint’s template minting page, they also give an option to make a custom mint button you can insert into your own website.
And that’s a wrap!
There’s plenty more configuration options on the settings and you can always reach out in the Curious Addy’s Discord as they are very readily available.
Most importantly you now know just how quick and easy it is to create an NFT collection for yourself with today’s no-code tools! If you’re ever thinking of launching your own collection you don’t even need a developer, just create the art and load it up onto Hey Mint!


