Launch a Soulbound NFT mint in 4 minutes
Learn what a Soulbound token is and how to quickly launch one yourself with Manifold
TLDR:
Soulbound NFTs once minted are bound to their minting address forever. In the code this is done by simply removing their ability to be transferred.
Use cases include verifiable credentials, credit scoring, proving humanity and there are plenty more.
With the Manifold community app “Souldrop: Soulbound Claims” you can create a soulbound NFT and mint page in a quick few minutes as shown below.
Recently I’ve been more focused on short tutorials on how to create different types of NFTs quickly with no-code tools. I wrote a tutorial for launching an NFT collection in 10 minutes, another for minting NFT artwork with Manifold in 7 minutes, and last week’s one was on how to create a Bitcoin NFT with Ordinals in 3 minutes.
People have found these useful, so in keeping with this theme this week I’ll show you how to a launch a soulbound NFT with Manifold. If you’ve not heard of soulbound NFTs then don’t worry, they are easy to understand and I’ll explain about them next.
Also, remember that if you share these posts you can get on the leaderboard and get some rewards!
What is a soulbound NFT?
The concept of a soulbound token was created by Ethereum founder Vitalik Buterin in one of his 2022 blog posts. Just as the name Ethereum is inspired by World of Warcraft so is the term “soulbound” in reference to soulbound items in the game.
The idea is incredibly simple, once minted a soulbound NFT will be owned by the minting address forever - conceptually you can imagine that when minted the token becomes “bound” to the addresses “soul”!
The implementation for this is also incredibly simple, as all you need to do is remove any functionality in the contract allowing the NFT to be transferred. For example with the ERC721 standard this just requires leaving the transfer functions empty.
Soulbound NFTs can have a variety of use-cases such as: (1) verifiable credentials - eg. proving you’ve earned a certification; (2) credit scoring - eg. proving that you are credible borrower for a DeFi app; and (3) proving you’re a human, hence limiting bots and spam. Naturally the counter argument to all of these is that your privacy is reduced when these NFTs and addresses becomes publicly associated with you.
Now I’m assuming that my readers are non-technical and are not going to start writing their own smart contracts, so instead I’ll show you how to use Manifold to create a soulbound NFT and allow anyone to come and mint it from its own page!
Manifold Soulbound Claims app
First you’ll need your own smart contract on Manifold, if you haven’t got one yet then I’ve ran through how to do this before in a previous tutorial.
Manifold allows community members to create their own apps, the soulbound one we’re going to use was created by community member called sweetdropnft!
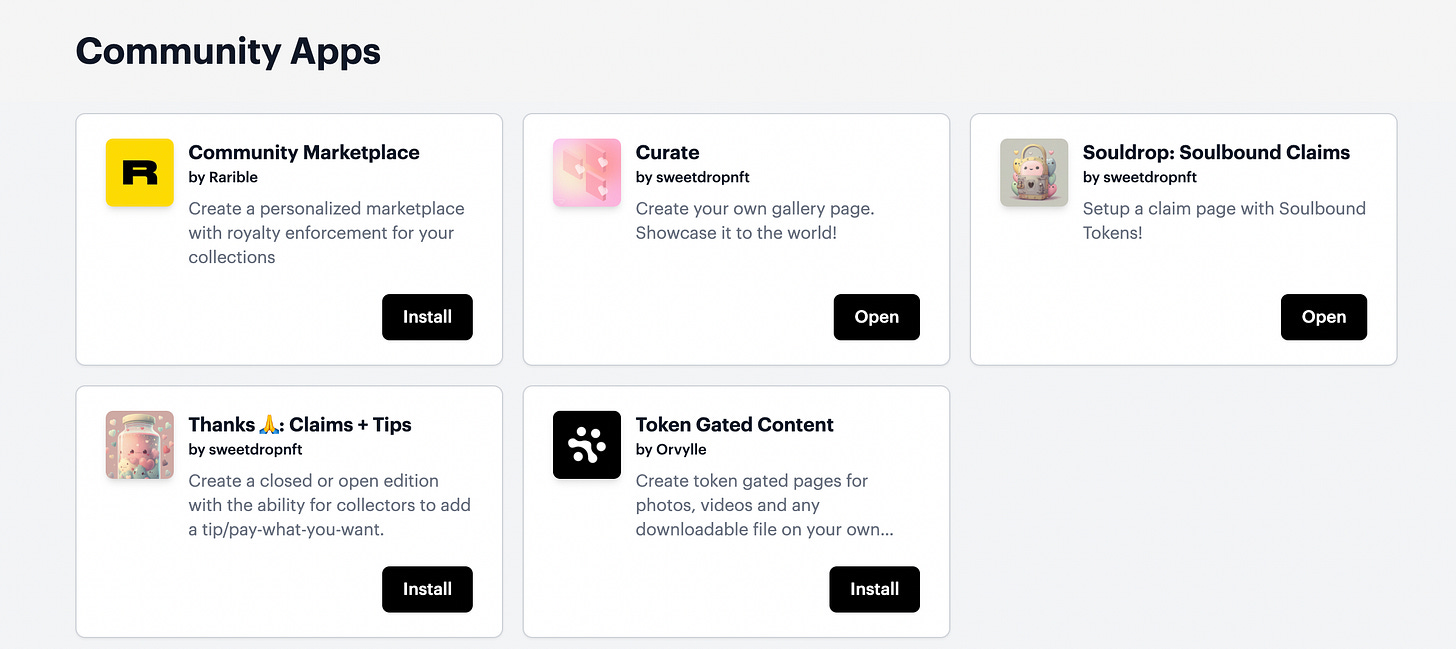
To open it go to https://studio.manifold.xyz/apps, browse the “Community Apps” available and select “Souldrop: Soulbound Claims”, then “Install” and “Open” it.
On opening you’ll get a brief explanation about the app. Select “New Souldrop Page” and then pick your contract that you want to use and hit “Next”.
Prepare Soulbound Claim
Now you’ll set up the token, it’s claiming rules and the what the claim page will say.
For this tutorial I grabbed a really simple picture from Google Images shown below that I felt represented a generic ID since ID passes are a good use-case for soulbound NFTs. Upload your image and scroll down to fill out the Title, Created By, URL, Description, and any other properties you may want to add to the NFT.
Next you can set mint rules like price, total supply and mint start and end dates for the NFT. Plus you can also essentially do a whitelist by importing a custom CSV file.
After all that, all that’s left is to set up the claim page details, setting the URL where you can find it and a description!
Review and Publish
On the last tab you’ll see a warning reminding you that this is a community app, so on every mint sweetdropnft will get a small cut in ETH. You’ll need to acknowledge this warning to move on.
Now, the last thing to do is just to have a look and review that everything looks right, if not you should hit “previous” and edit appropriately.
When you’re ready hit “Publish” and it will run through a process of uploading the assets then require you to sign through 3 transactions on Metamask.
Be aware! I spent over $30 in ETH for all these transactions to get validated on-chain.
Congratulations!
You’ve now created your own soulbound NFT page! Here’s the one I created.
Connect your wallet and hit the colourful “Mint” button to sign the transaction and get your new soulbound NFT!
And that’s a wrap!
With this pretty simple tutorial you now know how to launch your very own soulbound token with its own claim page!
Its simple and easy, although be careful not to get caught out with the fees involved.
Manifold is a really incredible tool even though right now there’s still less than 10 apps available. I can only imagine that in time there will be a lot of different types of mints you’ll be able to do.
In future tutorials I will run through some of the other Manifold apps available since there’s already some great ones there!


